Edraw Support Center
Get quick answers and step-by-step instructions in our support center.
Change Shape Fill and Shadow
Change Shape Fill Color
You can change the shape fill colors via the following steps:
- Select a shape.
- Click on the Style icon
 to open the right sidebar.
 - On the Style panel, click the Fill icon
 to choose your desired color to fill the selected shape.
No Fill
To make a shape colorless, or to remove fill from a shape, you can choose the “No Fill” option.
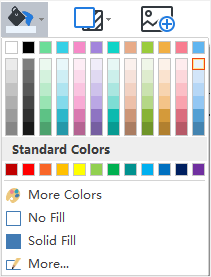
Theme Colors
The top section of the Fill colors is Theme Colors. They are predefined color sets of the current themes.

More Colors
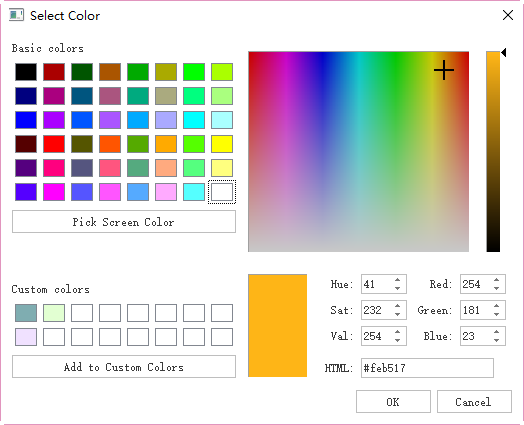
To use colors that aren't included in the theme colors or standard colors, click More Colors. In the pop-up window, you can:
- Choose a color from the color swatch.
- Select a color from the color palette.
- Click “pick screen color” to pick a color.
Transparency
To change the transparency, you can move the Transparency slider, or enter a number in the option box next to the slider. You can vary the % of transparency from 0 (fully opaque, the default setting) to 100% (fully transparent).
Gradient Fill
Click More… to find the Gradient Fill option and add a gradient fill to a shape. (Gradient: A gradual progression of colors and shades, usually from one color to the other, or from one shade to the other shade within the same color).
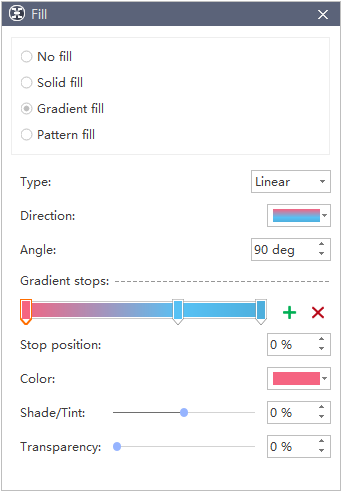
Gradient Type
To specify the direction when drawing the gradient fill, select an option from the list. The Type that you selected determines the available Direction.
Gradient Direction
To choose a different progression of colors and shades, click Direction, and then click your preferred option. The available Directions depend on the Gradient Type that you have chosen.
Angle
To specify the angle of the gradient fill which is rotated within the shape, enter your preferred degree value. This option is available only when you have selected Linear in the Type option.
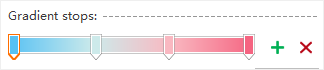
Gradient Stops
Gradient stops consist of a position, a color, and a transparency value. The transparency value applies to the gradient stop instead of the overall fill. Gradient stops can create non-linear gradients. For example, if you want to create a gradient that goes from red, green to blue, you need to add three gradient stops — one for each color.
Alternatively, if you want to create a gradient that shows up only in a corner of a shape, you need to use gradient stops to make the non-linear gradient.
Add: Click the green Add icon![]() to add a stop.
to add a stop.
Remove: Click the Red Cross![]() icon to delete a stop.
icon to delete a stop.
Stop position
To set the location for the color and transparency change in the gradient fill, please move the Stop position slider or enter a number in the option box below the slider.
Color
To choose the color of the gradient stop, click Color. To use a color that is not in the theme colors, click More Colors.
Pattern Fill
You can also fill a shape with a predefined pattern.
- Click the More… from the Fill drop-down menu.
- From the pop-up dialogue, click Hatch Fill.
- Choose a hatch from the predefined hatch gallery.
- Change the Front and Background color of the hatch.

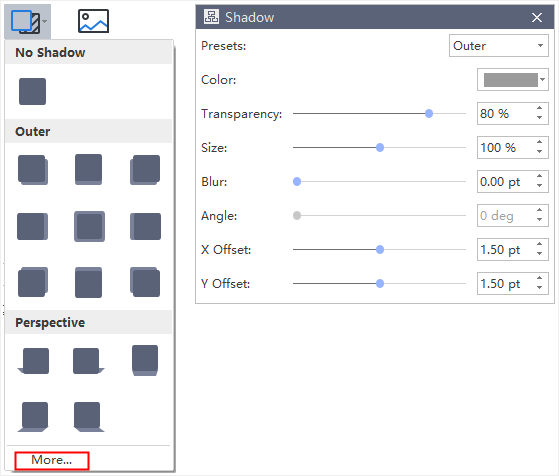
Change Shape Shadow
Click the Shadow button on the Shape panel, and then choose your preferred built-in shadow effect. If you cannot find your preferred one above, click More… to create customized shadows. This function lets you set customized shadow colors, effects, or offsets.
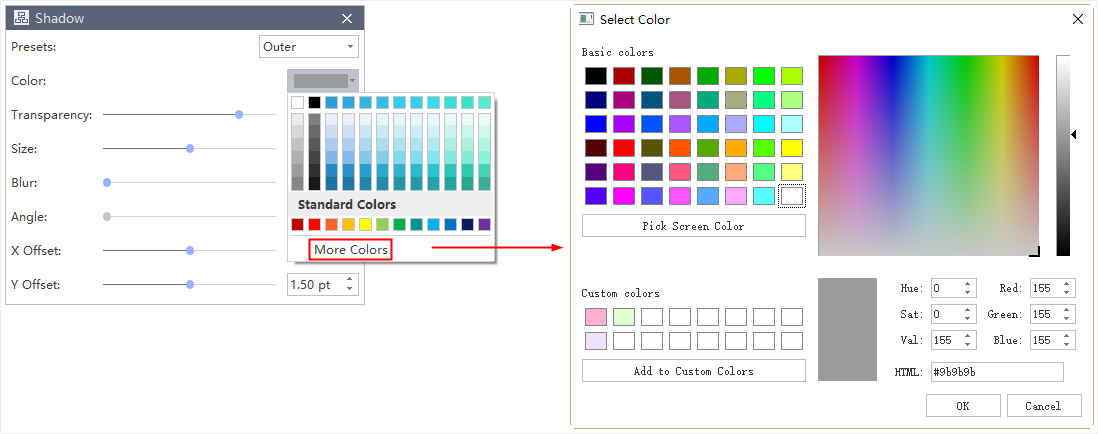
Shadow Color
To choose a color for the shadow, click Color in the Shadow dialogue, and then click your preferred color. To change to a color that isn’t in the theme colors, click More Colors.
Shadow Transparency
To specify how much you can see the shadow, please move the Transparency slider or enter a number in the box next to the slider. You can vary the % of transparency from 0 (fully opaque, the default setting) to 100 (fully transparent).
Shadow Size
To specify the angle of your shadow, please move the Angle slider or enter a value in the shape next to the slider. By using the Angle and Offset options together, you can place the shadow anywhere relative to the shape.
Shadow Blur
To set blur radius on the shadow, please move the Blur slider or enter a value in the shape next to the slider. The larger the radius, the blurrier, or "fuzzier", the shape or line will be.
Shadow Angle
To specify the angle of your shadow, please move the Angle slider or enter a value in the shape next to the slider. By using the Angle and Distance options together, you can place the shadow anywhere relative to the shape.
Shadow X Offset and Y Offset
To set a distance for an Angle of the shadow, please enter a value in the shape next to the slider.
