Edraw Support Center
Get quick answers and step-by-step instructions in our support center.
Table
Insert a Table
- Click Table on Insert tab. Move the pointer to select the number of rows and columns that you want, and then click.
- Click Insert Table…, and then enter a number in the Number of columns and Number of rows boxes.
- To add text to the table cells, click the cell, and then input your text. After you enter your text, click outside the table.
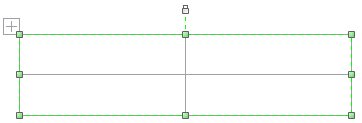
Move a Table
Click the table that you want to move so that  shows on the upper-left corner of the table. Place the pointer on the until
 ![]() appears, and then drag the table to the new location.
appears, and then drag the table to the new location.
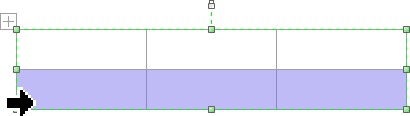
Resize a Row or Column
Click the column or row that you want to resize.
To change the width of a column, put the cursor over the border of the column that you want to resize, and then when the pointer becomes  , drag the column to the right or left.
To change the height of a row, put the cursor over the border of the row that you want to resize, and then when the pointer becomes  , drag the row up or down.
Add a Row or Column
Click the border to select a row in a table. Then click Insert Above or Insert Below button on Table tab. For column, select a column and then click Insert Left or Insert Right on Table tab.
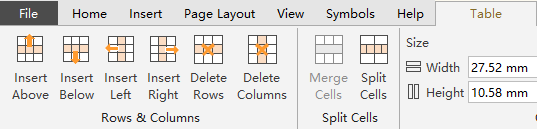
Delete a Row or Column
Select a row or column, and then click Delete Rows or Delete Columns.
Merge Cells
Select the table cells that you want to merge. Click Merge Cells on Table tab.
Split Cells
Select the table cell that you want to split and click Split Cells on Table tab.
To divide a cell vertically, enter the number of new cells that you want in the Number of row box.
To divide a cell horizontally, enter the number of new cells that you want in the Number of column box.
To divide a cell both horizontally and vertically, enter the numbers that you want in the Number of column box and the Number of row box.
Change Table Border
- Select the table cells which you want to add or change the table border.
- On Table tab, in Table Style group, click Borders, and then choose a border style in the pop-up menu.
- To change the color of the border, on Home tab, in Styles group, click the arrow next to Line button, and then click the color that you want.
- To change the weight of the border, on Home tab, in Styles group, click Line button, click the arrow next to Weight, and then choose the line weight that you want.
- To change the line style of the border, on Line menu, click the arrow next to Dash type, and then click the dash type that you want.
- To change the cells’ transparency, on Line menu, move the slider of the Transparency, or enter the number in the box next to the slider
Change Cell Margin
Select the table cells that you want, then set the text margin in the cell. On Table tab, in Table Style group, click Margin, and then choose a style in the pop-up menu.