Edraw Support Center
Get quick answers and step-by-step instructions in our support center.
An Introduction of MindMaster
MindMaster is a useful tool that makes it possible for you to create a wide variety of mind maps. These are diagrams that use nodes and other visuals of different colors, like clipart and marks, to represent concepts, ideas, words, tasks, information, and more. They can show you how different things are related to each other and are often used for project management, team brainstorming, classroom instructions, and public presentations.
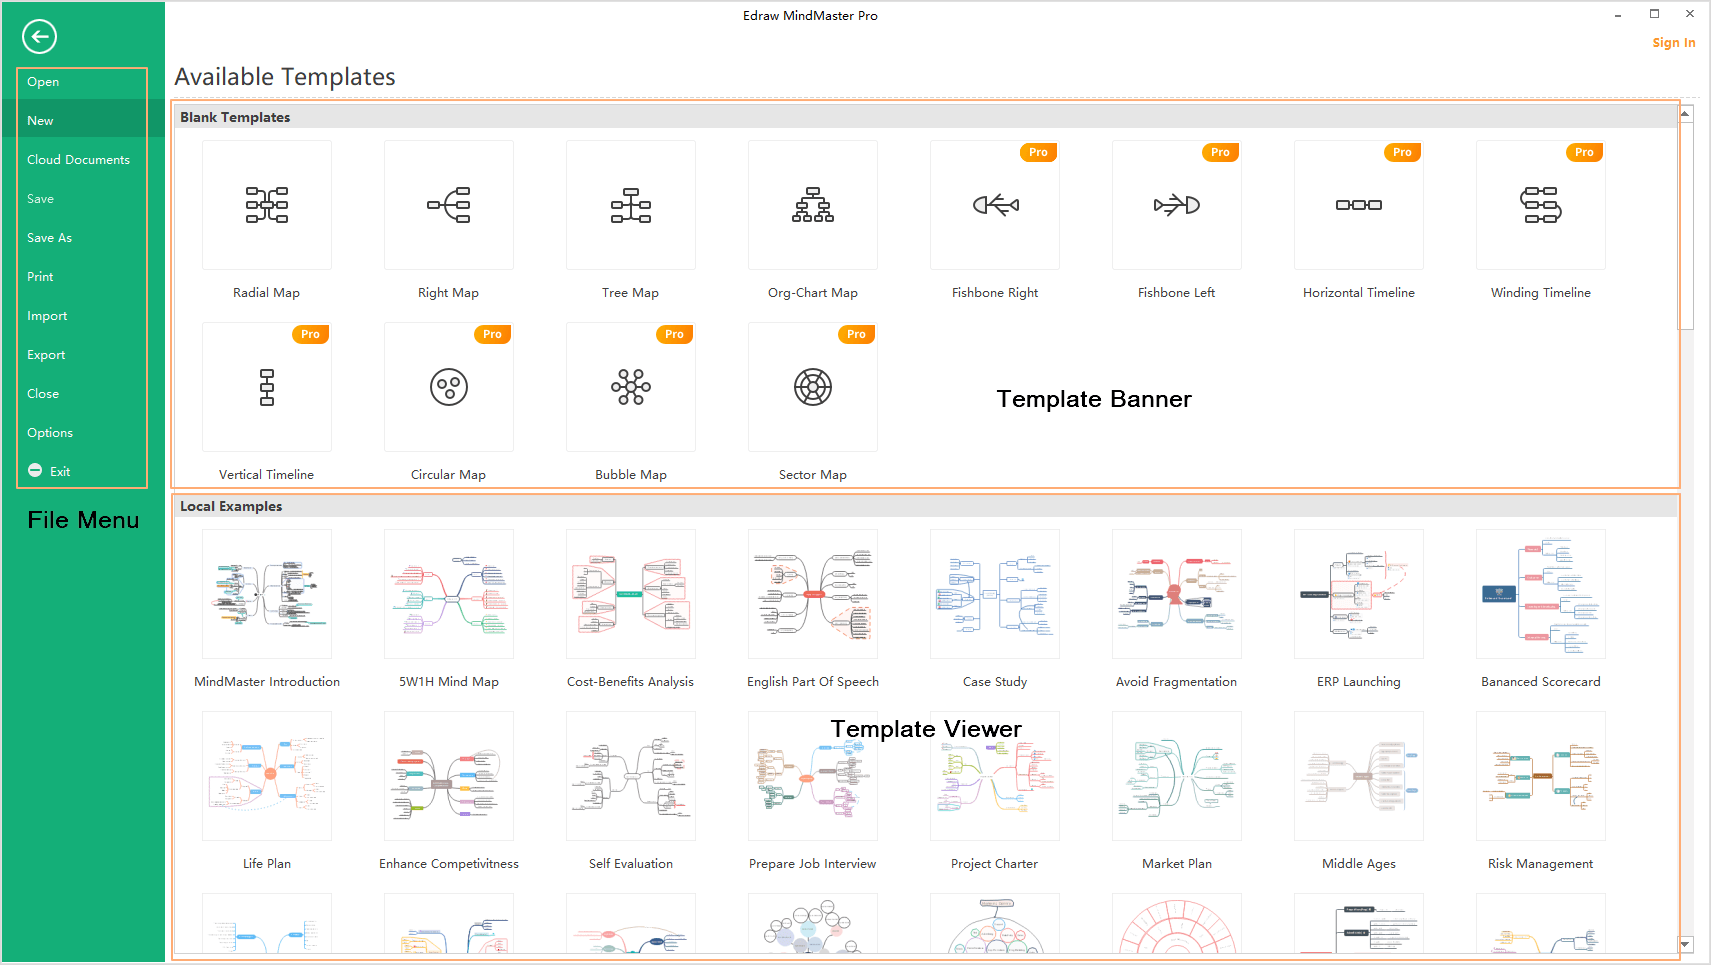
After opening MindMaster, you will find yourself on the template page where you can pick up your favorite mind map templates.
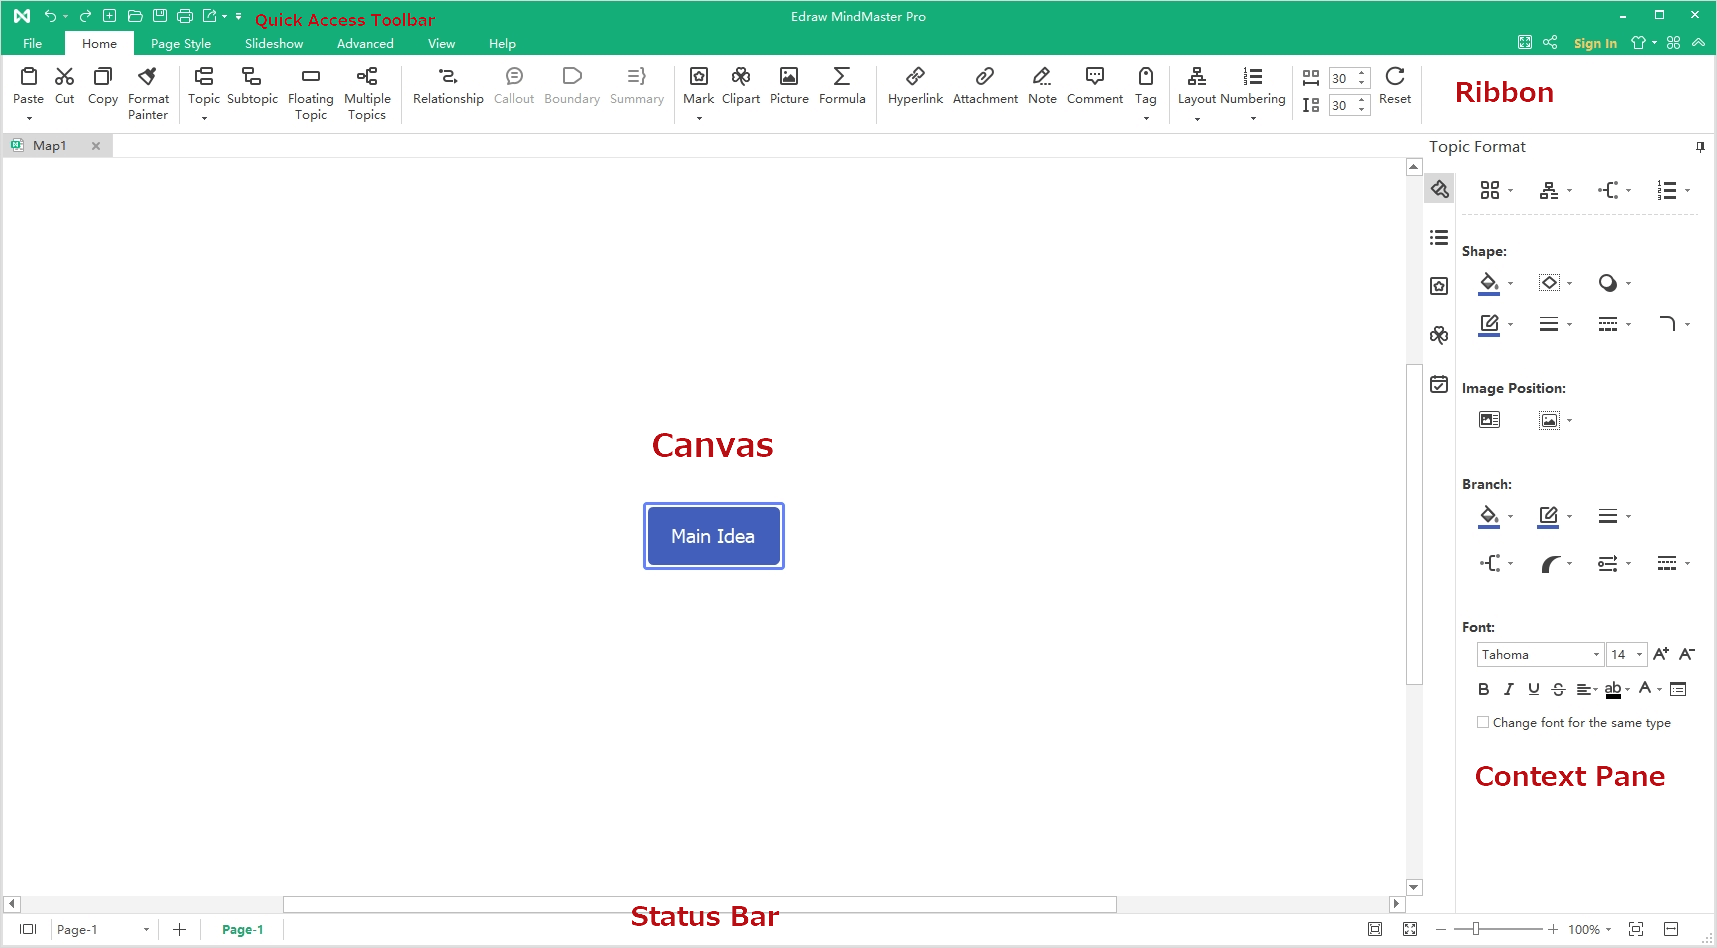
When you start to work with MindMaster, here you can see Quick Access Toolbar, Ribbon, Canvas, Context Pane and Status Bar in the workspace.
Quick Access Toolbar
On the Quick Access Toolbar, there are quick commands: Undo/Redo, New, Open, Save, Print and Export. Click the triangle next to the Export icon, you can customize the toolbar by adding or unchecking the preset options.

Ribbon

1. Home Tab
On the Home tab, you can choose to insert topics, relationships, callouts, marks, clipart, images, formulas, hyperlinks, attachments, notes, comments or tags into mind maps. You can also adjust map layouts, number your topics, and set horizontal or vertical distances between branches.
2. Page Style Tab
The Page Style tab is where you can format your mind maps. You can select a theme, make a custom theme, choose theme fonts and theme colors. You can also choose rainbow styles, give your mind map a hand-drawn look, edit or remove backgrounds, and insert your own watermarks.
3. Slideshow Tab
On the Slideshow tab, you can create slides manually or auto-generate your slides. Feel free to edit or remove any content in your slide pages. Once it's finished, you can preview your work in full screen, then export it to PPT or print it out. Alternatively, you can choose to traverse your mind map topic by topic or branch by branch.
4. Advanced Tab
On the Advanced tab, you can create, edit and export Gantt Charts based on your mind map. You can enable the functions of Find & Replace and Spelling Check, or add font symbols to your maps. In case of unexpected situations (e.g. laptop power-off), File Recovery will help you save your work. At present, MindMaster supports to set passwords for your documents.
5. View Tab
The View tab shows different view options for your work. You can display your maps on different levels or focus on a single topic or branch. Besides, you can zoom in or out your maps and make your maps fit the canvas.
6. Help Tab
On Help tab, you can easily find related guides for reference via Tutorial, FAQ, Contact Us and Shortcut Key. There are buttons for software activation, deactivation, check for updates. There also shows quick access to the mobile version of MindMaster and online collaboration.
Context Pane
1. Format Pane
The Format pane will be changed when you select different objects, so it includes Page Format pane, Topic Format pane, etc., where you can customize the styles of the selected objects.
2. Outline Pane
On the Outline pane, you can choose to see your maps in the outline mode. At the top right corner, you can export the outline to PDF, Word, Excel or PPT by clicking the mini buttons.
3. Mark Pane
On the Mark pane, you can see commonly-used marks for mind maps such as Priority, Progress, Face, Arrow, Flag, and Star. You can add and manage your own mark groups by clicking the Mark Manager button on the top right corner.
4. Clipart Pane
On the Clipart pane, you can get a large number of original designed symbols and icons to decorate your mind maps. You can browse by category or search for your preferred ones in the top search box.
5. Task Pane
On the Task pane, you can add task information to topics, such as start and end dates, duration, resources, priority, and progress. You can also switch to the Gantt view by clicking the Gantt button.