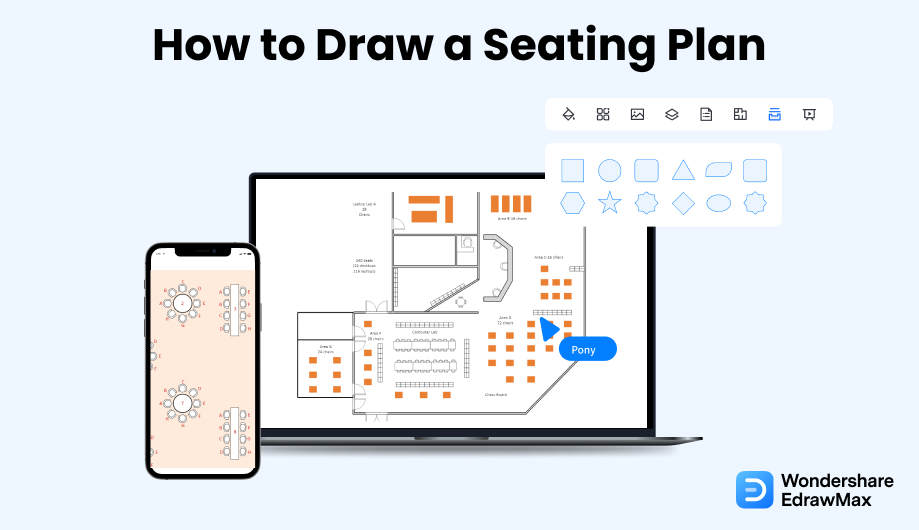
How to Make a Seating Chart
Edraw Content Team
Do You Want to Make Your Seating Chart?
EdrawMax specializes in diagramming and visualizing. Learn from this article to know everything about how to make a seating chart with ease. Just try it free now!
In a generic classroom setup, seating charts are considered the sit-down position of the students and the teacher. In an informal event, like a wedding or a birthday party, a seating chart is used to provide the seat numbers to the guests while ensuring that the important people are seated in the front. This guide will walk you through the importance of making a seating chart, different types of seating charts, and some of the crucial steps you need to follow to create a good seating chart.
We will also help you understand some of the most commonly used seating chart symbols, the general way to make a seating chart, and how EdrawMax lets you create a seating chart in just a couple of minutes by giving you access to free templates and symbols. Before we dive into designing the seating chart in EdrawMax, let us help you understand what is included in a seating chart and what are some of the basic preparations that you need to do before you plan to create a seating layout for your formal or informal events.
1. What Includes in a Seating Chart
Based on the requirements and resources, there are several types of seating charts, like wedding seating charts, classroom seating charts, event seating charts, chevron seating charts, auditorium seating charts, banquet hall seating charts, and cabaret seating charts, and more. So, every seating chart will be different, but the core zest will remain the same.
Here are some of the most important elements that are included in every seating chart:
- An entire layout of the area
- The designated theme that one has followed while creating the seating chart
- Tables, Chairs, Desks, and other elements
- Different furniture that will go along with the theme
2. Preparations for Making a Seating Chart
Now that you have decided to make a seating chart, you should know that certain preparations have to be done to create a technically correct seating layout. Some of the basic steps that you have to consider can be:
- Make it simpler:
- Understand the theme:
- Choose the right symbol:
- Understand the importance of labeling:
- Revisions:
Remember that everyone prefers a good seating arrangement, so when you start planning to create a seating chart, ensure that you do not add too many chairs or tables. Try to be as simple as possible.
If you make the seating chart for the classroom and have added circular chairs, it would be difficult for the teacher to communicate with the students properly. If you create large table charts for a wedding, it will not go along with the theme. As you see, understanding and finalizing the theme is very important.
When you start drawing the seating charts, try to use universally accepted symbols for chairs, tables, circular tables, etc.
Always label every element correctly, as it would be difficult for others to understand the seating chart if you have not correctly labeled the furniture or the entrance/exit areas.
Always leave some room for revisions as you might not know what changes you might face after working on the seating arrangement.
- Try to make the seat chart as simple as possible.;
- Consider appropriate theme for your seat chart;
- Try to use universally accepted symbols for chairs, tables, circular tables, etc;
- Understand the importance of labeling;
- Always leave some room for revisions.
3. How to Make a Seating Chart in General
There are two ways of creating and designing a seating chart in architecture and building planning. The old way is to create everything on paper and discuss it with your event team. Another one is a more efficient way where you draw the seating chart with diagramming tools, like EdrawMax. Before going in-depth about the ways to make a seating chart with EdrawMax, let us walk you through the steps of making the seating chart using the general method.
- Understand the area:
- Finalize the theme:
- Gather the right seating arrangement:
- Finalize the right chairs:
- Add components:
- Revise:
If you need to create the seating chart for the school, then understand how many chairs or tables you can accommodate in one room. So, it is crucial to gather all the information regarding the area.
Every seating chart is different, depending on the environment and the current need. In order to correctly create the seating chart, you should first finalize the theme. If you create a classroom seating arrangement, then your design will vary from the one where you create the seating arrangement for a banquet hall.
Once you understand the theme and analyze the area, you can choose the right tables and chairs. Remember that seating arrangements for classrooms, wedding rooms, computer laboratories, and others will all be very different. You can add the tables in this step to help you identify the correct seating arrangement.
After adding the tables, you can start adding the right chairs as per the theme and the room's size.
Every room has different components that enhance its look and feel. After adding the tables and chairs, you can add important components, like bar chairs, computers (if making a seating arrangement for a computer laboratory), etc.
Before sharing the seating layout with your architect or the event manager, you should do multiple rounds of revisions to ensure that you have not missed out on any important component.
- Understand how many chairs or tables you can accommodate in one room;
- Finalize the theme;
- Identify the correct seating arrangement;
- Adding the right chairs as per the theme and the room's size;
- Add components: Every room has different components that enhance its look and feel;
- Do multiple rounds of revisions to ensure that you have not missed out on any important component.
4. How to Make a Seating Chart in EdrawMax
Now that you are wondering how to make a seating chart? Well, there are basically two ways that you can follow. The first method is to make a seating chart from scratch using EdrawMax, and the other method is when you work smartly and choose templates provided by EdrawMax. Here we will walk you through the basic ways of making a seating chart.
4.1 Make a Seating Chart from Scratch
Step1 Login to EdrawMax
If you are using the offline version of EdrawMax, then open the tool in your system. If you wish to have remote collaboration, head to EdrawMax Download and log in using your registered email address. If this is your first time using the tool, you can register yourself using your personal or professional email address. Go to 'Building Plan' and click on 'Seating Plan.'

Step2 Open a New Canvas
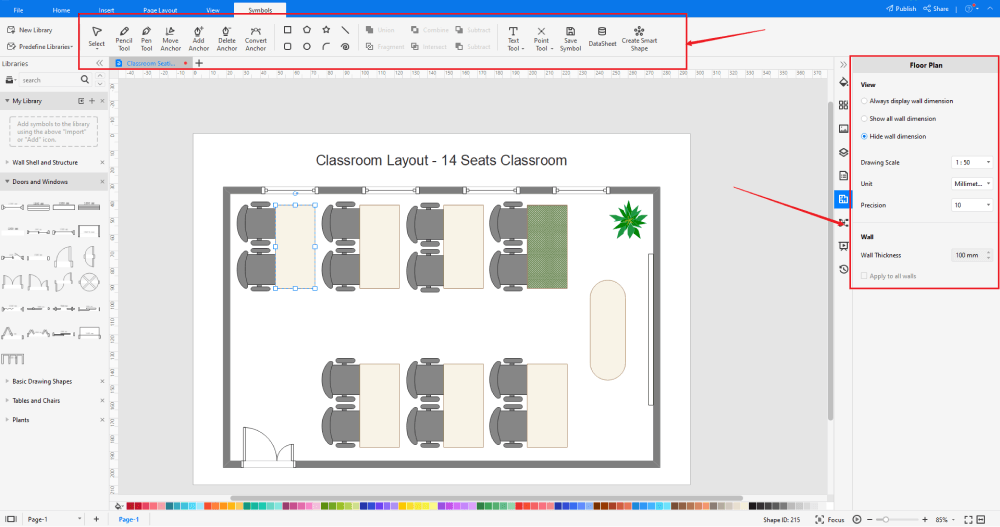
Since you are creating the seating plan from scratch, you can click '+.' It will open up the user-friendly EdrawMax canvas. Create the basic outline and properly scale it as per the measurements that you have. Change the background color or add details that you might have found from the floor plan design.

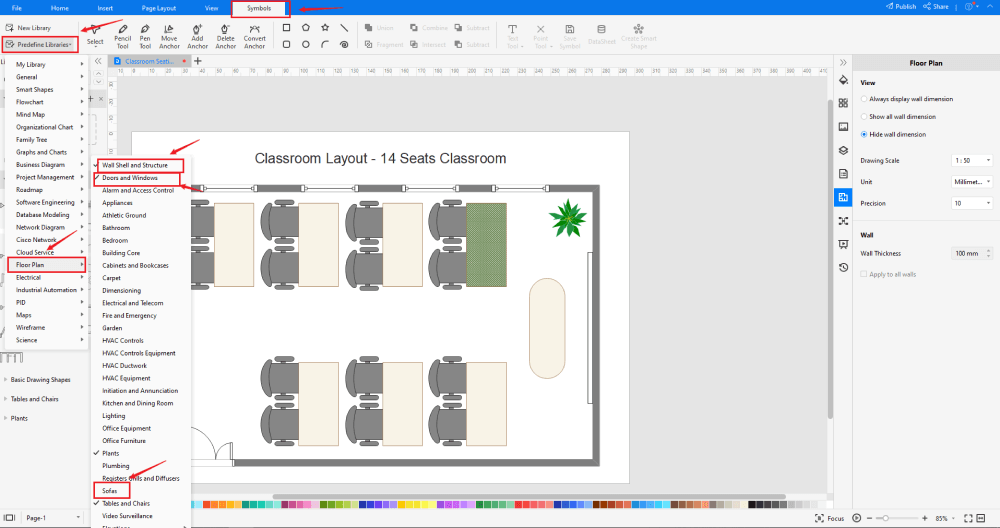
Step3 Find Seating Chart Symbols
Every seating plan diagram is incomplete without symbols. Head to the 'Symbols' section and click on the 'Predefined Symbol' section from the top toolbar. Click on 'Sofa' and 'Door and Windows' to drag and drop each seating chart symbols in your canvas. If you don't find the proper symbols, you may import or create your own symbols with ease, and save to your symbol libraries for later use. Learn more seating chart symbols guide and find symbols you want here.
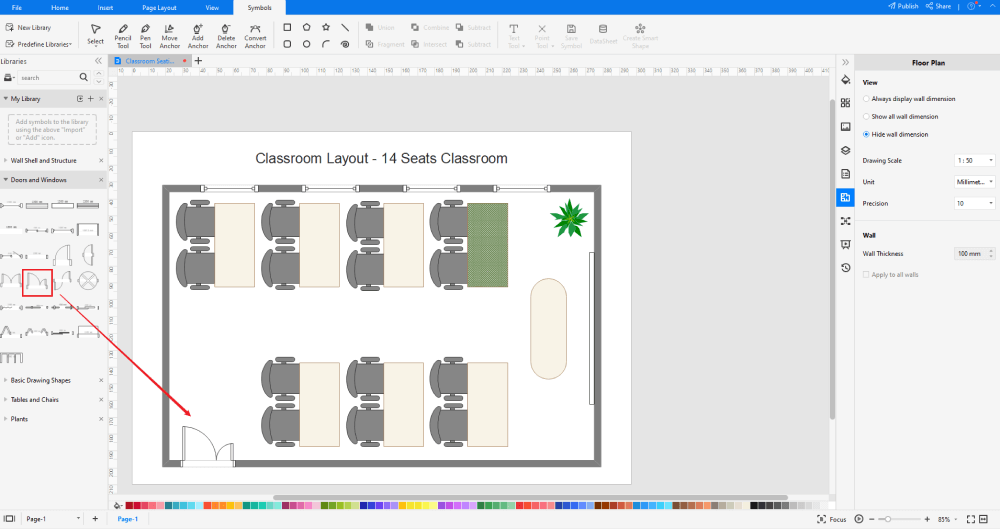
Step4 Add More Elements
Once you have imported all the symbols, you can start placing them in the seating design that you have created in Step #2. You can add 'Wall Shell and Structure,' 'Doors & Windows,' and 'Sofa' to your seating plan. Depending upon your need and theme, you can modify these symbols without worrying about losing the formatting of the drawing. Then, use toolbars on the top or right side of canvas to change the color, font, size, theme, and more with one click.
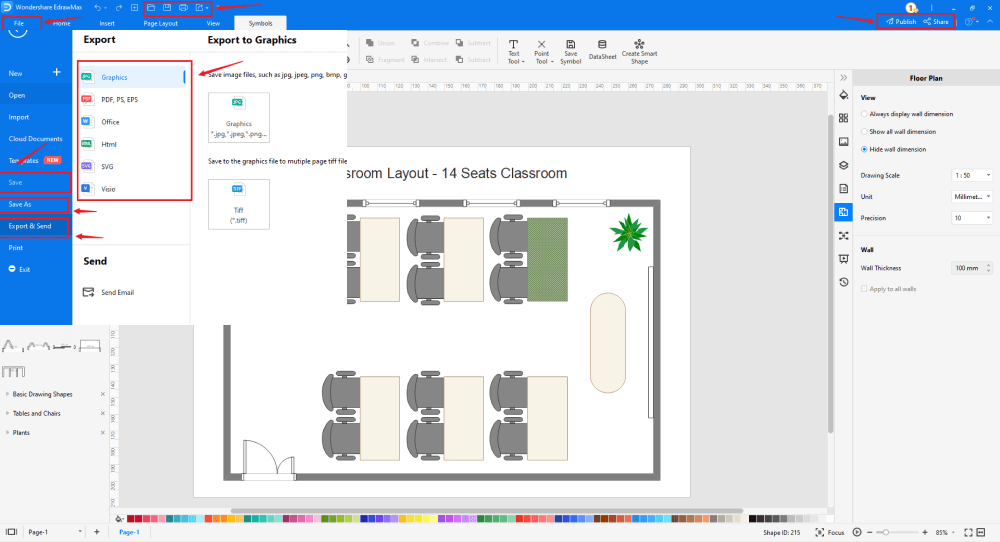
Step5 Save & Export
After designing the seating chart, you can export it into multiple formats, like JPEG, JPG, PNG, PDF, and other Microsoft formats, like MS Word, MS Excel, PPTX, etc. You can also share the seating layout design on different social media platforms, like Facebook, Twitter, LinkedIn, etc. Furtheremore, you can print your seating chart for showing with others.
4.2 Make a Seating Chart from Templates
Step1 Login to EdrawMax
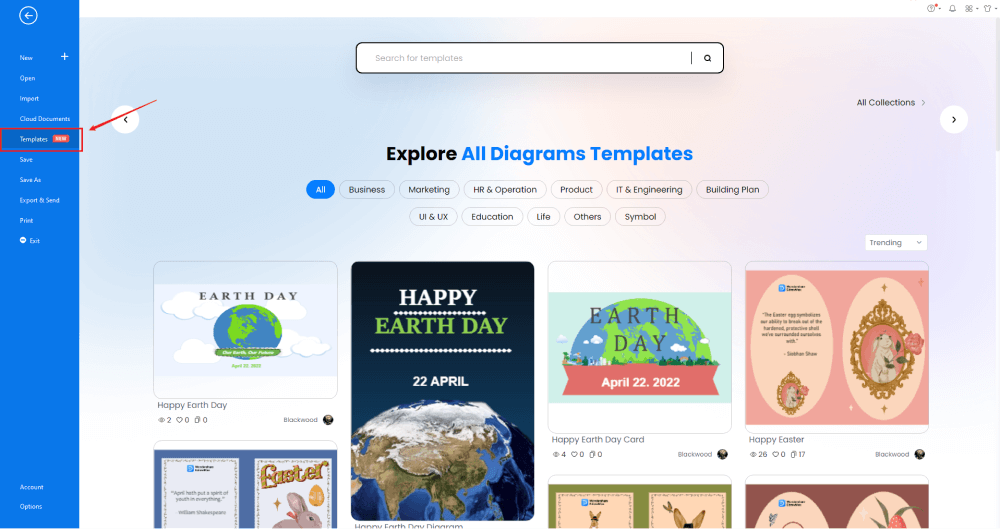
If you are using the offline version of EdrawMax, then open the tool in your system. If you wish to have remote collaboration, head to EdrawMax Download and log in using your registered email address. If this is your first time using the tool, you can register yourself using your personal or professional email address. Go to the 'Templates' section on the left and type Seating Chart.'
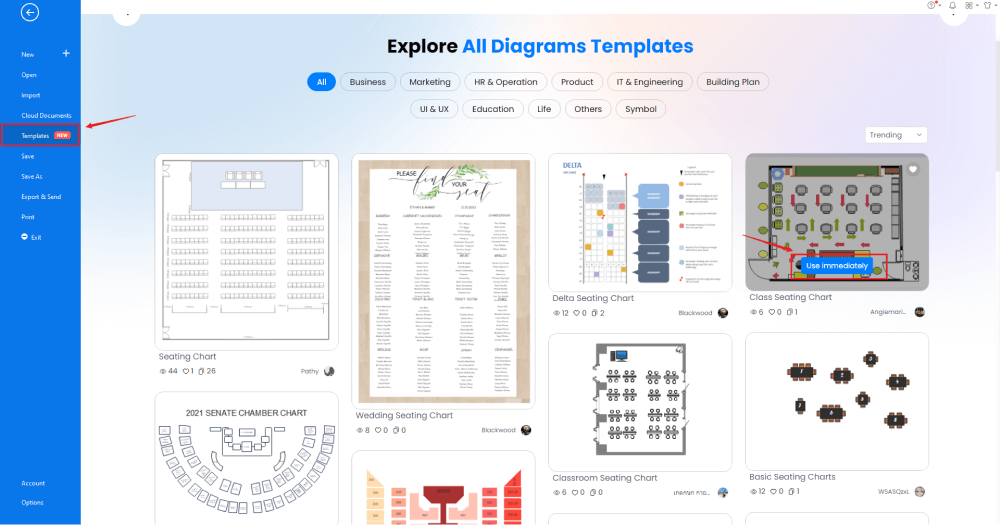
Step2 Choose a Template
From the Template Community, you will find hundreds of built-in templates readily available to use. Choose any templates that closely resemble your ideal seating chart design and duplicate it to 'Use Immediately.'
Step3 Change Details
Once you have imported the free built-in template to the EdrawMax canvas, you can change basic details as required. You can modify the font, change the background color, and add features like a sofa, a circular table with chairs, a 1-seat sofa, a tea table, etc. Just choose the toolbars on the top or right side of canvas, and find the functions you want.
Step4 Export or Publish
Once your seating chart design is ready, you can export it to multiple formats as mentioned above or publish it to the template community for the other 25 million registered users to see and get inspired by your design. Just click the "Publish" button on the top right area of the canvas, and fill in your template details, like template title, description, and tag to share your drawing with others.
Basically, it is simple to make a seating chart in EdrawMax, just grab a template and keep customizing, drag and drop professinal seating chart symbols to make your seating chart better. If you are still confusing about how to draw seating charts in EdrawMax, just check the video below, or learn more from our Youtube channel.
5. Tips & Consideration
Even though all the templates provided by EdrawMax are completely free, it is recommended to make some changes if you duplicate the template. By doing some basic tweaks, you ensure that your seating chart design remains unique in its way.
If you are a beginner or are in a hurry, you can surely consider going ahead with the free templates this seating chart maker provides. Else you can start working on the designs from scratch and play around with the designing tools, like changing the color, adding the background color, using watermark, modifying the dimensions, etc.
Advantages of creating a seating chart from scratch
- You will have full control of the designs.
- The chances of adding wrong items to the seating chart would be minimal.
- If you are working on the seating chart from scratch, you will easily remember the important changes you made while creating the seating arrangement.
Advantages of creating a seating chart using templates
- You do not need any technical expertise to create seating charts if you are using pre-built templates
- These free templates are 100 percent customizable
- You can create your seating chart layout in just a couple of minutes
5.1 Symbol Libraries
EdrawMax hosts over 50,000 vector-enabled symbols that are readily available to design any diagram. Head to the symbol section on the left panel, and you will find all the designated symbols to draw a seating chart. In rare cases, you can also import the symbols from the 'Predefined Symbol' section that can be found under the 'Symbol' option in the toolbar.
Some of the highly used seating chart symbols are:
- Couch: In seating plans or seating charts, a couch is an upholstered piece of furniture used in lounges, restaurants, large bedrooms, and even in living rooms.
- Tea Table: A Tea Table is a small table usually used in European countries to serve afternoon or early eve tea.
- Sling Chairs: Sling Chairs are casual chairs constructed using a simple frame paired with a single sheet of material for the back and the resting seat.
- Tables: Table symbols are extremely important in seating plans or charts. All the designs that you do start with choosing the right table symbols as they can be square tables, rectangle tables, round tables, and such.
- Dining Table: Dining tables are the large tables used to serve meals. The dining table can be a rectangle, square, or even circle, depending upon the room size and number of members.
- Square Table: You will use a square table symbol in that seating chart to keep four guests together.
The amazing feature of using EdrawMax is that it lets you create your seating chart symbols. So, if you cannot find any seating chart symbols in the extensive library, you can upload your icons or shapes to make them the symbols that you can use in the later stage of designing the seating charts.
5.2 Template Community
EdrawMax has over 25 million registered users, whom we can Edrawers. These registered users are constantly updating the template community to ensure that you will never run out of any templates to get inspired from. In the template community, you will find hundreds and thousands of templates of different diagram types, ranging from network diagrams to flowcharts to science diagrams to architecture diagrams.
6. Free Seating Chart Maker
Even though you can go ahead and design the seating chart on your pen or paper, you can even go ahead and hire some wedding planners to design the wedding seating chart for you. However, all these will cost you a ton. In the United States alone, a good wedding planner costs you around $2,000. If you are like us, who tend to save resources and hard-earned money, then you should opt for free seating chart software, like EdrawMax.
EdrawMax is a power-packed tool that comes with several features that are important to creating and sharing any type of design. Some of the great features of this free seating chart software are:
- EdrawMax comes with free seating chart examples & templates that are 100 percent customizable;
- EdrawMax easily integrates with Google Drive and DropBox.
- EdrawMax comes with the highest level of SSL certification, ensuring that all of your cloud files remain secured.
- This free seating chart software lets you easily create different types of seating layouts, like classroom layout, banquet hall layout, chemistry lab layout, etc.
- EdrawMax comes with a free online version that lets you have real-time remote collaboration with your team members.
- With EdrawMax, you can easily import and export MS Visio files, making it one of the best alternatives to MS Visio.
7. Final Thoughts
Seating Charts are extremely important when we talk about formal or informal gatherings. All the IT or designing offices worldwide have their seating chart patterns. Similar to this, different cultures have their unique wedding seating charts.
As you saw in this elaborated guide, making a seating chart with EdrawMax is extremely easy as it is loaded with several amazing features. The free templates provided by this free seating chart software let all beginners and amateurs create high-functioning diagrams with utter ease.
Seating Chart Complete Guide
Check this complete guide to know everything about seating chart, like seating chart types, seating chart symbols, and how to make a seating chart.
You May Also Like
How to Draw a Landscape Plan
How-Tos
How to Draw a Building Plan
How-Tos


