How to Draw a Rack Diagram
Edraw Content Team
Do You Want to Draw Your Rack Diagram?
EdrawMax specializes in diagramming and visualizing. Learn from this article to know everything about how to draw your rack diagram with ease. Just try it free now!
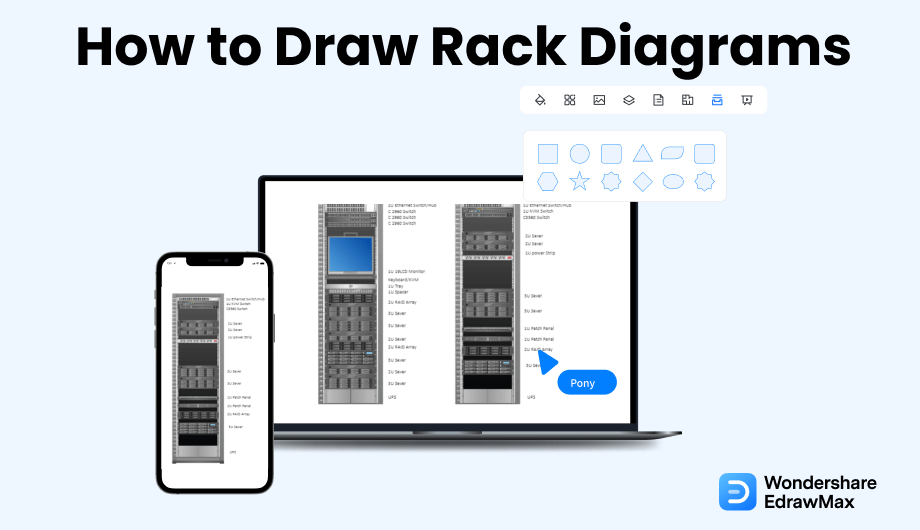
Rack diagrams, are an essential visual tool that helps system administrators and network architects to organize IT equipment inside a server rack. A server rack is used to minimize the use of space while housing various IT hardware and systems. Rack diagrams help you visualize the placement of various pieces of equipment. You can also determine the kind of racks or equipment you require while purchasing new networks or computing equipment.
Rack diagrams are also sometimes referred to as rack elevation as they are two-dimensional diagrams that are drawn to scale, which helps in choosing the appropriate size of the rack. They can also be used to show the front and rare elevation of the layout. In this article, we will help and guide you through the process of drawing rack diagrams. This article will tell you what components are required for a rack diagram and how you can use EdrawMax to make the process faster and easier.
1. What To Consider in a Rack Diagram
The first and the most important thing before drawing a rack diagram is to know all its components. It is necessary for you to know what a rack diagram is composed of. These components will expedite the process of drawing rack diagrams and ensure that you have not missed anything:
- Physical Location of Data Center Assets:
- Measured Readings of Power and Temperature:
- Power Port Information :
- Equipment:
The physical location of data center assets is essential to know for a rack diagram. You need to have all the details regarding the site location, cabinet location, and the U position of the asset.
It is necessary to have the measured readings of power and temperature in order to keep an eye on how they will affect the server rack. This will also be depicted in the rack diagram. Therefore, you must have the measured readings before starting a rack diagram.
In order to place the server rack in the right place, it is important for you to know where all the power ports are in a building or room. You must find a server rack that works with the position of various power ports.
You should also know all the information regarding the type of equipment you want. Things like servers, switch equipment, UPS, hard disk, and modems.
- Physical Location of Data Center Assets;
- Measured Readings of Power and Temperature;
- Power Port Information;
- Equipment;
2. Preparations for Drawing a Rack Diagram
Before you start anything, it is important to have all prerequisites for it. Thus, here we will help you out in the preparation of drawing a rack diagram. Make sure you keep the following things in mind before you draw a rack diagram.
- Enlist the equipment
- Be familiar with all the symbols
- Gather the essentials
Make a list of all the equipment that you require or that you will be using. This will help you in compiling the requirement of equipment.
Make sure that you are familiar with all the symbols that can be used in a rack diagram. It will help you in drawing the diagram as you will know when to use which symbol.
It is important that you gather all the required essentials before drawing a rack diagram. You must have a paper, pen, scale, tape, and other stationery at hand if you are hand drawing. If you are using an online tool, make sure you have the most efficient and user-friendly tool, such as EdrawMax.
3. How to Draw a Rack Diagram in General
Let us now proceed toward the actual task of drawing a rack diagram. Drawing a rack diagram is not that difficult as long as you have the right tools at hand. Here we will first give you the general guidelines for drawing a rack diagram on the paper, and then we will show you how you can do that using a network diagramming software, such as EdrawMax. Depending upon your requirements and resources, you can choose either of the two methods.
- Take the Dimensions:
- Arrange the Components:
- Add Symbols :
- Draw Equipments:
- Leave Space for Cables:
- Use the Rack Diagram:
The first step is to take accurate measurements of the components, i.e., the equipment you are going to stack up in the rack. Then make the dimensions of the box on paper. Draw the boxes according to the scale that you are using. Depending upon your requirement, you can draw the front view or the back view, or both.
Arrange the components of the rack as you want to set them eventually. Arrange them as you see fit, whether it is according to size or some other factor.
Once you have the components listed and boxes drawn, it is time to list down the symbols that you will be requiring.
Once you have all the required information, it is time to put it on paper. Draw the equipment to scale on the paper. Arrange it on the rack as you want to set it. Arrange and re-arrange the equipment till you reach the desired organization. Add symbols as you see fit.
Lastly, make sure you leave space for cables, especially in a multi-rack environment. This will ensure that there are no unnecessary cables entanglement and damage to them.
Once you have everything designed on paper, use the rack diagram to set things. They will fit perfectly!
Overview of the standard method of drawing rack diagrams:
- Take the Dimensions;
- Arrange the Components;
- Add Symbols;
- Draw Equipments;
- Leave Space for Cables;
- Use the Rack Diagram;
4. How to Draw a Rack Diagram in EdrawMax
Now let's look at how you can draw a rack diagram using one of the best diagramming tools, which is EdrawMax. EdrawMax makes your work a hundred times easier as it has built-in templates, symbols, and shapes that you can use. They are easy to access and readily available. There are two ways in which you can draw a rack diagram in EdrawMax. You can use the templates provided by EdrawMax, or if you don't find a template as per your requirement, you can also draw a rack diagram from scratch.
4.1 Draw Rack Diagrams from Scratch
Step1 Open EdrawMax & Login
If you are using the offline version of EdrawMax, then open the tool in your system. If you wish to have remote collaboration, head to EdrawMax Download and log in using your registered email address. If this is your first time using the tool, you can register yourself using your personal or professional email address.

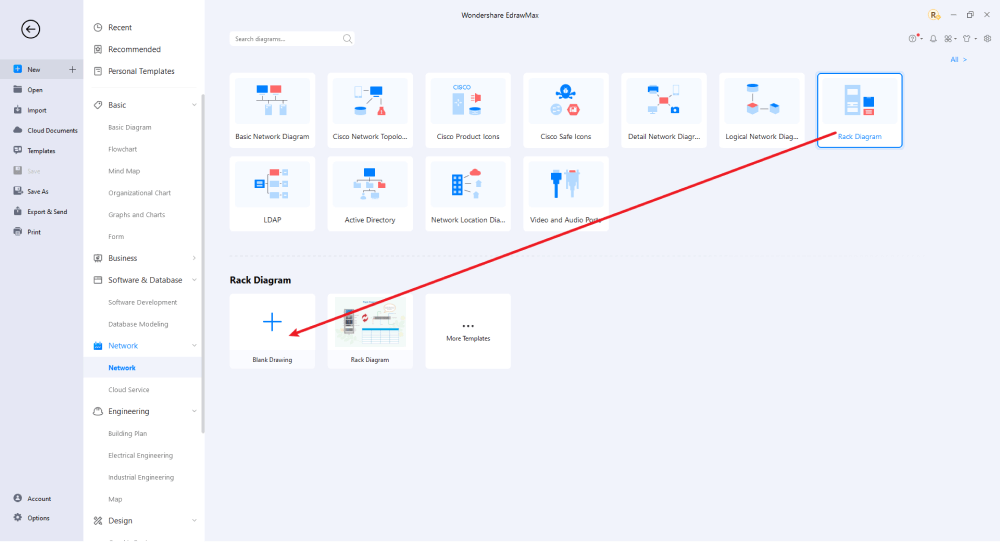
Step2 Open a New Canvas
You can create rack diagrams quickly and professionally in this drawing program from scratch. The program has a simple user interface and many features, like importing images, adding and modifying shapes, changing colors, pencil drawing, and more. It's easy to create a basic outline and scale it according to your measurement.
Step3 Select Symbols
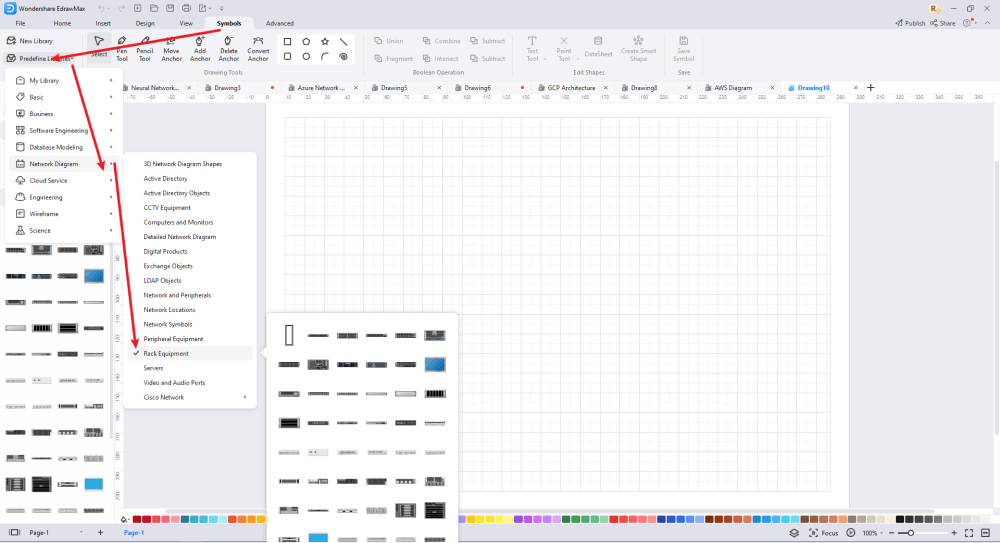
To enhance your rack diagrams, you'll need to include symbols. Check out the 'Symbols' section, and search rack, followed by the desired set of symbols.
Step4 Add Elements
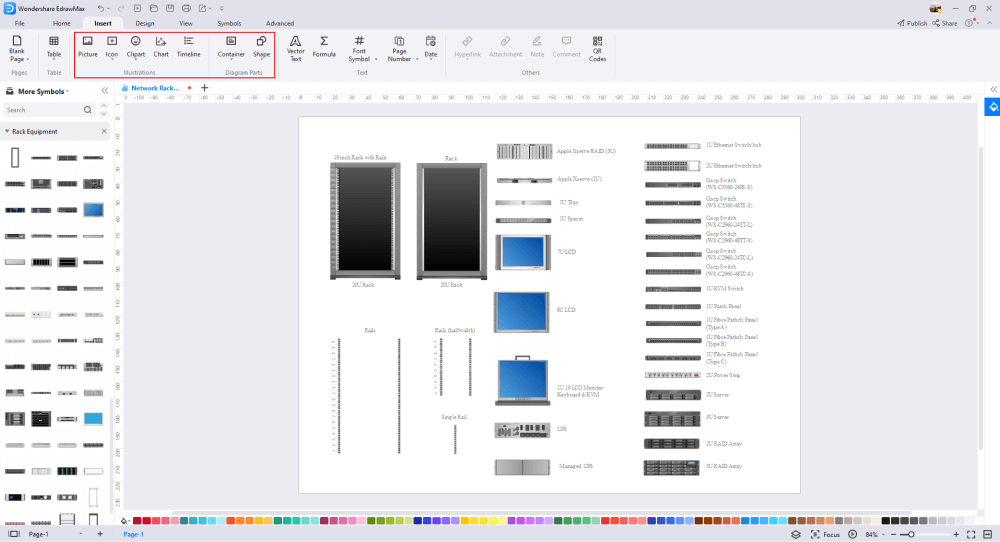
After you've imported all of the symbols into the rack diagram drawing, you can place them on the canvas. You can add hardscape and softscape drawings and all the other elements. Use the toolbars on the right side of the screen to change the color, size, font, etc.
Step5 Save & Export
After designing your rack Diagram, you can export it into several formats, like JPG, PDF, PNG, and many more formats that come with Microsoft Office. You can also share the network layout design on social media platforms, like Twitter, Facebook, LinkedIn, etc.

4.2 Draw a rack Diagram from Built-in Templates
Step1 Login to EdrawMax
If you are using the offline version of EdrawMax, then open the tool in your system. If you wish to have remote collaboration, head to EdrawMax Download and log in using your registered email address. If this is your first time using the tool, you can register yourself using your personal or professional email address. Go to the 'Templates' section on the left and type 'Rack Diagram.'

Step2 Choose a Template
In the template community, you will find hundreds of built-in templates readily available to use. Choose any templates that closely resemble your ideal rack diagram and duplicate it to 'Use Immediately.'

Step3 Change Details
First, make sure that you've imported the free built-in template to the EdrawMax canvas, and then you can change basic details. You can modify the background color, text, and layout. You can draw different types of rack diagrams. Just choose the toolbars on the top or right side of canvas, and find the functions you want.
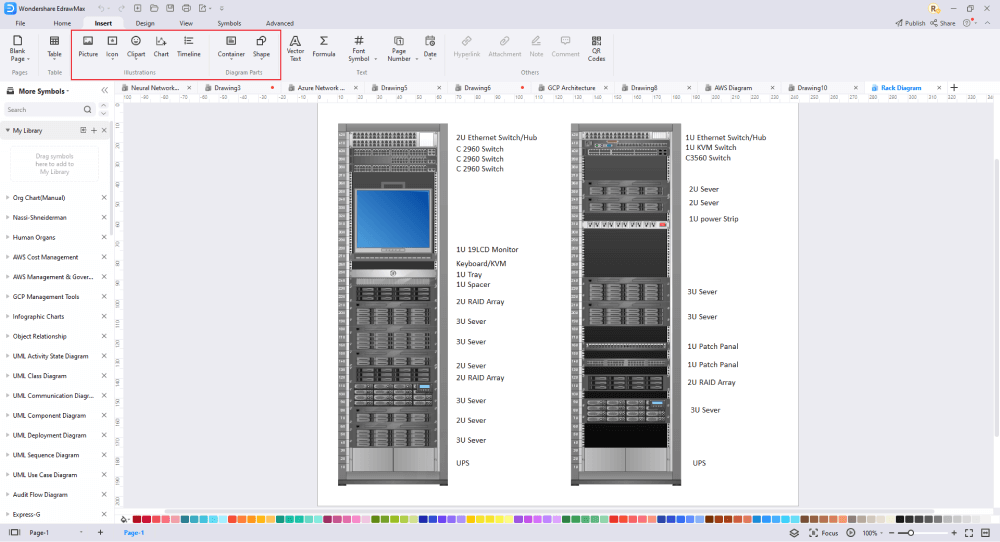
Step4 Export or Publish
Once your rack diagram is complete, you can save it to multiple file formats as described in the instructions or post it to the template community for the other 25 million registered users to see and get inspired by your neural network drawing. Click the "Publish" button on the top right area of the canvas, and fill in your template details, like template title, description, and tag to share your drawing with others.

Basically, it is simple to draw a rack diagram in EdrawMax, just grab a rack template and keep customizing, drag and drop professinal rack symbols to make your diagrams better. If you are still confusing about how to draw a rack diagram in EdrawMax, just check the video below, or learn more from our Youtube channel.
5. Tips & Considerations
Although EdrawMax makes your work super easy, here are some additional tips for you to consider in order to ensure zero mistakes in your final result.
- Tip 1: Select a Network Design
- Tip 2: Keep the Future in Mind
- Tip 3: Review Your Rack Diagram
Before you start drawing a rack diagram, make sure you know which type of network design you are going to be working with. This will enable you to ensure the efficient working of your physical rack server.
Don't forget that you will be using that rack for a while. Make sure you cater to your future needs and requirements when designing the rack diagram. Make a flexible rack diagram so that you can accommodate new items when you have to change or add new components.
Once you have drawn the rack diagram, review it yourself and also ask your peers to review it to ensure that no mistakes have been made. This will ensure that nothing is left out and that the physical rack server will be installed smoothly.
5.1 Symbol Libraries
EdrawMax is equipped with an extensive symbol library that caters to all your diagramming needs. It has over 5000 vectors enabled that are fully customizable to meet your requirements. Select the symbol and resize, reshape, recolor, or reformat it according to the project's need. Several important symbols fall under rack diagrams. If somehow the library does not have the symbol you need, you can easily import its image and create your symbol effortlessly. You can also save it in your personal library for future use.
5.2 Template Community
EdrawMax has a rich template community that that gives users a quick start. These professionally designed templates are completely customizable, giving you the freedom to change them as per the project requirement. All you need is to open the template section from the left panel on the home screen and choose the one that best fits your project. You can find a variety of them for a single classification. This free rack diagram software also lets you publish your design to the template community, where it can inspire other designers just like yourself.
6. Free Rack Diagram Software
Drawing a rack diagram can be a tedious and time taking task, but with the right tools at your service, this daunting task is made easy. Use EdrawMax to fulfill your requirement of drawing rack diagrams. Since EdrawMax is an all-in-one diagramming tool, it has multiple templates for you to use, which can be accessed with ease. The best part about this software is that it is free of cost. Not only is it user-friendly, but it also offers many more features that prove to be extremely helpful. Here are some features that make EdrawMax the perfect tool for rack diagrams:
- EdrawMax comes with multiple free and useful templates of rack diagrams that you can customize according to your need.
- You can also share your content with people by exporting it in different formats, including Office, PDF, Visio, etc. You can also share it on social media or email it to your friends and family.
- You can easily make presentations with the help of the slideshow maker that is present within EdrawMax. You can use it to easily convert your content into a presentation and then present it to your colleagues.
- There are a lot of premade shapes and symbols that make it easy for you to design your diagrams. You can also annotate icons according to your needs and requirements.
- EdrawMax also enables you to encrypt files and make a backup so that you can keep them safe and secure.
7. Final Thoughts
Rack diagrams are an essential visual tool to use in order to ensure the smooth installation of physical rack servers by network administrators. This article aptly describes all the essential tools and preparation you need to do in order to design a perfect rack diagram.
After going through this guide, you will be sure that EdrawMax is all you need for your diagramming needs. The best tool that will ensure not only perfect work but also fast work. It is a great diagramming tool that is user-friendly and free! So, if you want to improve your rack diagrams, go and get EdrawMax now! Happy Diagramming!

Rack Diagram Complete Guide
Check this complete guide to know everything about rack diagram, like rack diagram types, rack diagram symbols, and how to make a rack diagram.
You May Also Like
How to Make a Floor Plan in Word
How-Tos
How to Make a Floor Plan in PDF
How-Tos


