How to Create Status Table
With the pre-defined status table template, you can create task status, system status dashboard, product status dashboard and etc.
Start to Create a Status Table
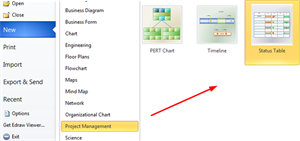
Open Edraw, on the start page find Project Management category and double click Status Table template to get into the drawing page.
Status Table Symbols
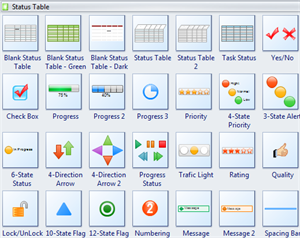
On the left of the drawing page, you can find all the shapes and symbols for Status Table in the library.
Drag a Pre-made Status Table to Start Drawing

Simply drag a status table you would like to use from the library, and drop onto the drawing page.
Add or Remove Rows and Columns
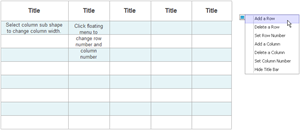
Click the shape and you will see a floating button, through which you can add or remove rows and columns.
Change the Shape Size
Steps:
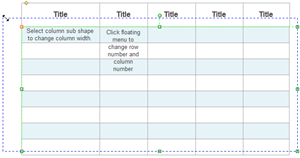
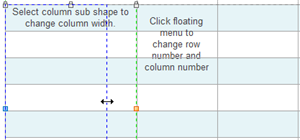
1. Click on the table once to select the whole shape. You can see yellow and green handles on the table.
2. Drag the green handles to change the size of the whole shape; and drag the yellow diamond handle to change the height of the title bar.
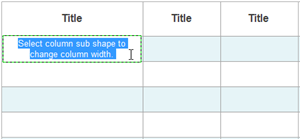
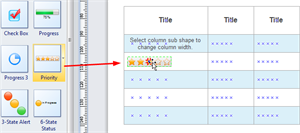
3. Click again to select a column sub shape, and two blue handles will appear. Drag the blue handles to change column width.
Edit Text
Double click a cell to add text.
Change the Title Bar Fill Color
Steps:
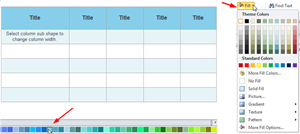
1. First you need to select the title bar. (By default, click once you select the whole table, so you need to click the title bar area twice to select the title bar.)
2. Apply a color from the quick access color bar at the bottom of the page or apply from the HOME tab, Fill button.
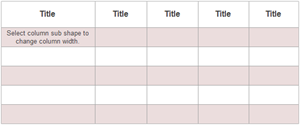
3. You can change the table fill color in the same way.
Mark the Table with Dynamic Symbols

The symbols are dynamic, which can be snapped and glued with the table together.
Steps:
1. Drag a required symbol from the library and approach to the table, and each box will appear a blue X. When the symbol gets to the right position, the blue X will turn red.
2. Release your mouse, and the symbol will be glued with the box.
3. Each symbol has more than one styles inside, you can click the symbol and choose more options through the floating button.
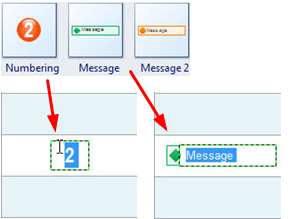
4. For Numbering symbols and Message symbols, you can select and double click the shape to change the number and message content.
5. The color of the symbol is changeable. Select a symbol and go to Home menu, Fill button to change the color.
Links:
How to Create House of Quality Diagram
How to Create Workflow Diagram


