Drawing simple lines and shapes
In the library menu, you can use these drawing tools to draw line, arc, spiral, rectangle, rounded rectangle, oval, polygon and star shapes.

EdrawMax
All-in-One Diagram Software
- Superior file compatibility: Import and export drawings to various file formats, such as Visio
- Cross-platform supported (Windows, Mac, Linux, Web)
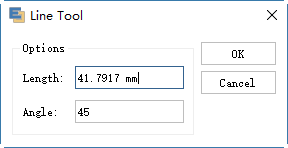
Draw Straight Lines with the Line Segment Tool
Use the Line tool when you want to draw one straight line segment at a time.
- Select the Line tool.
- Do one of the followings:
- Position the pointer where you want the line to begin, and drag to where you want the line to end.
- Double click where you want the line to begin, the "Line" property dialog will appear and specify the length and angle of the line. Then click OK.
Draw Arcs
Use the Arc tool when you want to draw one arc segment at a time.
- Select the Arc tool.
-
Do one of the followings:
- Position the pointer where you want the arc to begin, and drag to where you want the arc to end.
-
Double click where you want the line to begin, and in the
dialog box set the following options. Then click OK.
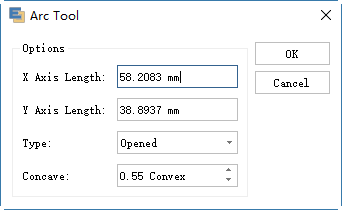
Notes:
Length X‑Axis Specifies the width of the arc. Length Y‑Axis Specifies the height of the arc. Type Specifies whether you want the object to be an open path or a closed path. Slope Specifies the direction of the arc's slope. Enter a negative value for a concave (inward) slope. Enter a positive value for a convex (outward) slope. A slope of 0 creates a straight line.
Draw Spirals
- Select the Spiral tool.
-
Do one of the following:
- Drag until the spiral is the desired size. Drag the pointer in an arc to rotate the spiral.
-
Double click where you want the spiral to begin. In the
dialog box, set any of the following options, and click OK.
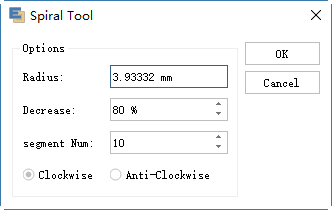
Notes:
Radius specifies the distance from the center to the outermost point in the spiral. Decrease specifies the amount by which each wind of the spiral should decrease relative to the previous wind. Segment Number specifies how many segments the spiral has. Each full wind of the spiral consists of four segments. Style specifies the direction of the spiral.
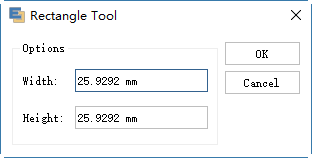
Draw Rectangles and Squares
- Select the Rectangle tool.
- Do one of the followings:
- To draw a rectangle, drag diagonally until the rectangle is the desired size.
- To draw a square, hold down the Shift key while you drag diagonally until the square is the desired size.
- To create a square or rectangle using values, double click where you want the center point to be. Specify a width and height, and click OK.
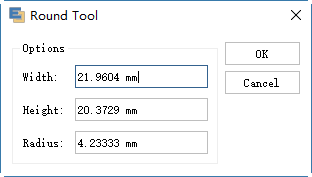
Draw Rounded Rectangles
- Select the Rounded rectangle tool.
-
Do one of the followings:
- To draw a rounded rectangle, drag diagonally until the rectangle is the desired size.
- To draw a rounded square, hold down the Shift key while you drag diagonally until the square is the desired size.
- To create a rounded square or rounded rectangle using values, double click where you want the center point to be. Specify a width, height and the corner radius, then click OK.
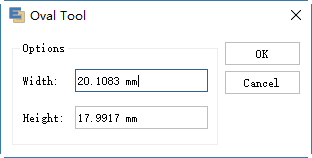
Draw Ovals
- Select the Oval tool.
-
Do one of the followings:
- To draw an oval, drag diagonally until the ellipse become the desired size.
- To draw a circle, hold down the Shift key while you drag diagonally until the circle become the desired size.
- To create a circle using values, double click where you want the center point to be. Specify a width and height, then click OK.
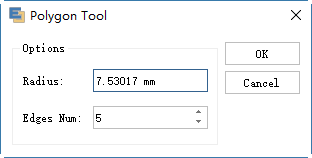
Draw Polygons
- Select the Polygon tool.
-
Do one of the followings:
- Drag until the polygon is the desired size. Drag the pointer in an arc to rotate the polygon. Press the Up Arrow and Down Arrow keys to add and remove sides from the polygon.
- Click where you want the center of the polygon to be. Specify a radius and number of sides for the polygon, and click OK.
Note:
Triangles are polygons too! You can draw one just as you make any other polygon.
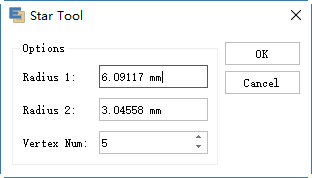
Draw Stars
- Select the Star tool.
-
Do one of the followings:
- Drag till the star is the desired size. Drag the pointer in an arc to rotate the star. Press the Up Arrow and Down Arrow to add and remove points from the star.
- Double click where you want the center of the star to be. For Radius 1, specify the distance from the center of the star to the star's innermost points. For Radius 2, specify the distance from the center of the star to the star's outermost points. For Vertex Num, specify how many points you want the star to have. Finally, click OK.