Block Diagram | Complete Guide with Examples
If you want to start a new system and are in its planning phase, you need a block diagram to visually illustrate and explain your idea. Not only this, but a well-prepared block diagram also gives you an overview of the expected outcomes of the process you are planning to implement.
Therefore, here you will learn what block diagrams are and what their advantages are, what points must be kept in mind while preparing a block diagram , and how to prepare one in the easiest possible manner with the least efforts.
What is a Block Diagram
In a nutshell, a block diagram is a less detailed form of a flowchart that is meant to demonstrate how a new system or an improved version of an existing one would work to get a particular task done. A block diagram is mostly used in the engineering domain, where every aspect of a process needs a dry run (typically on paper) before it is implemented practically.
Unlike regular flowcharts, a block diagram focuses on the key elements of the proposed system instead of elaborating the entire process with minute details.
Purpose and Benefit
The main goal of drawing a block diagram is to give an overview of the workflow that could be expected from the system post its completion. With the clear illustration, it becomes easy for the engineers to assess the smooth functioning of the process and to identify the existing elements (or the missing ones) that might obstruct, hinder, or unnecessarily delay the output.
The Benefit of having a block diagram is that it helps the engineers and their teammates to understand the idea without going through lengthy sentences. This helps the staff overcome the language barrier that many organizations/departments have to face when they hire people from varied regions of the world.
Symbols of Block Diagram
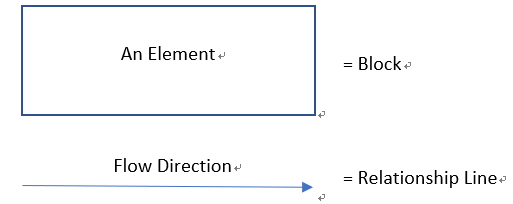
A block diagram majorly comprises rectangle shapes known as blocks and the straight lines with arrows at the end. While the blocks represent the key elements of the entire process, the arrowed lines show the relationship between the two objects and the direction the data, information, processing, signals, or the electric current flows in.
An important point to note, and always keep in mind, here is that all the blocks and the connecting lines must be well-labeled. When a block is to be labeled, its name (the element that it represents) must be written inside the rectangle. On the other hand, in the case of the connecting lines, the name could be written above or below them within appropriate proximity.
The following picture shows the two main symbols and their significance in a typical block diagram:
Note: Even though the rectangles and arrowed lines are used to create a block diagram most of the time, some modern and advanced computer applications allow you to use/add other decorative shapes to make such illustrations look more eye-catchy.
What to Do before Creating a Block Diagram
- Understand the System
It is important to have a good understanding of the system you are about to draw a block diagram of. With a clear idea in your mind, the illustrations that you will put on paper will be more informative and helpful to your team members and other people involved in your project.
- Get a Rough Text
Since it is you who is going to draw a block diagram, make sure that you write the important elements, their relationship with the other objects, and the direction of information/process flow on a paper. Because only you will be reading such notes while creating the diagram, you can prepare this transcript at your convenience. Once the content is written, it can be used as a reference guide.
- Get into Details If Need
Although a block diagram is mostly used merely to illustrate the key elements and give an overview of the entire process of a system, if a deeper analysis is needed, you are free to make the drawing as detailed as you possibly can.
- Make a Tool Draw for You
Earlier the block diagrams were drawn with colored markers on long sheets of paper (called chart sheets). However, with the advancement in technology and the ease of accessibility to smart devices like a tablet or a computer, it would be much convenient if you prefer using an efficient drawing program like EdrawMax by Wondershare overdoing the stuff manually.
How to Make a Block Diagram in EdrawMax
As hinted above, Wondershare EdrawMax is an efficient drawing tool. The program can be used as a good alternative to Microsoft Visio that is not only expensive. It is also way more complex as compared to EdrawMax.
Further, EdrawMax is equipped with several libraries populated with a plethora of domain-specific shapes and symbols to help you draw your preferred illustrations in no time. The templates that are present in the application even enable you to skip the primary steps of adding shapes to the canvas, and you can immediately begin with the labeling part after selecting the one of your preference.
To make a block diagram in Wondershare EdrawMax, you can follow the instructions given below:
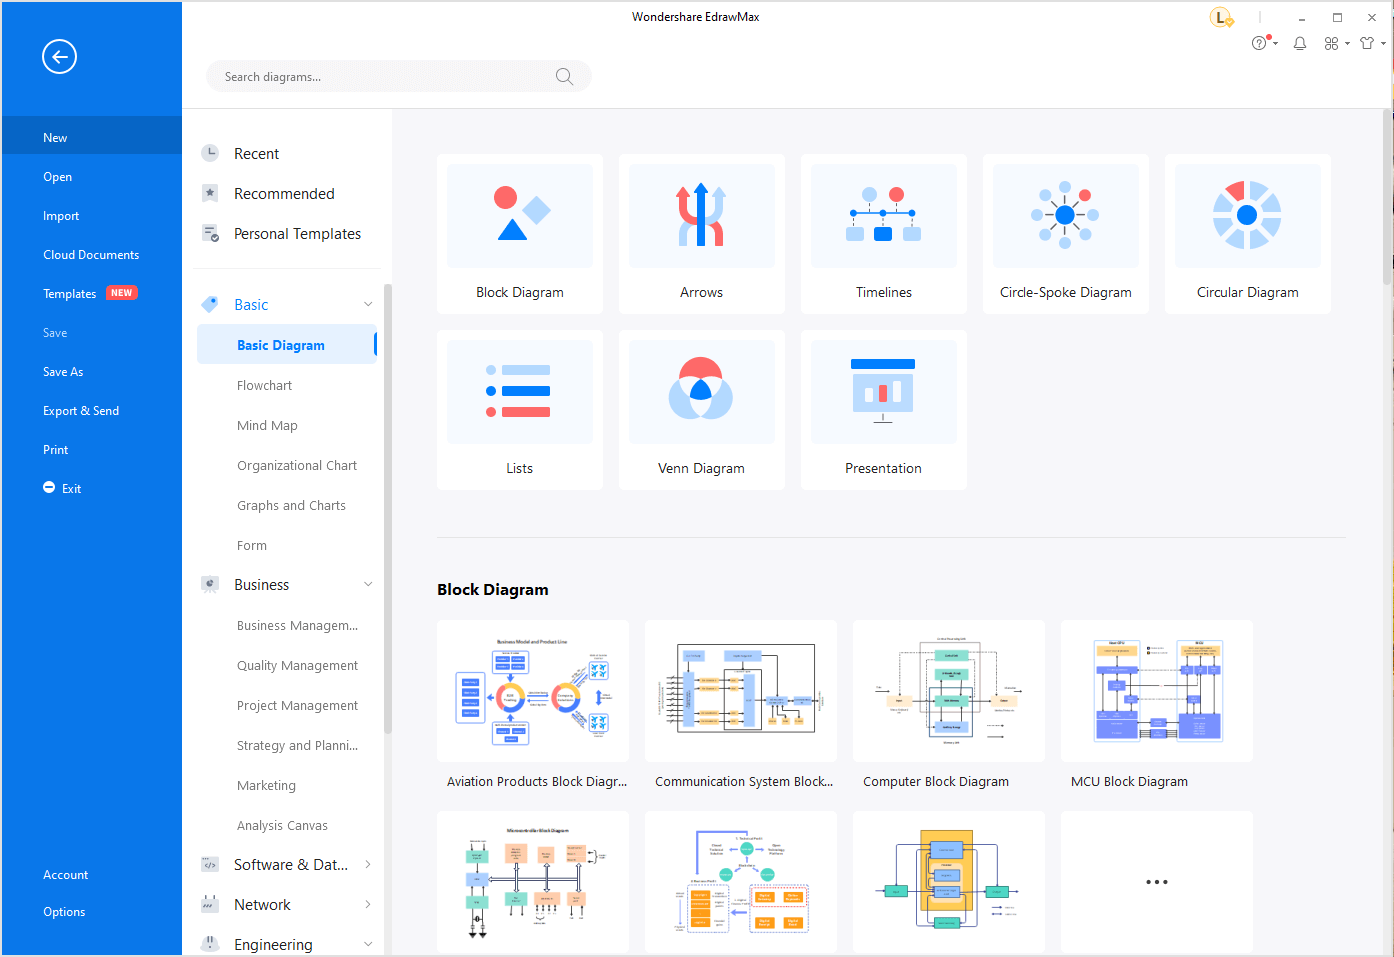
Step 1: Pick a Block Diagram Template
Start Wondershare EdrawMax on your computer, ensure that New is selected in the navigation pane at the left, confirm that Basic Diagram is selected in the diagram types list in the middle, and click to select Block Diagram from the top row of the right window. Next, click your preferred block diagram template from the available ones present in the lower area of the right screen.
Step 2: Label the Shapes
When the template opens up in the workspace, double-click the first shape, and edit its label to fit your domain-specific name or jargon. Repeat this process for all the blocks (elements) in the diagram.
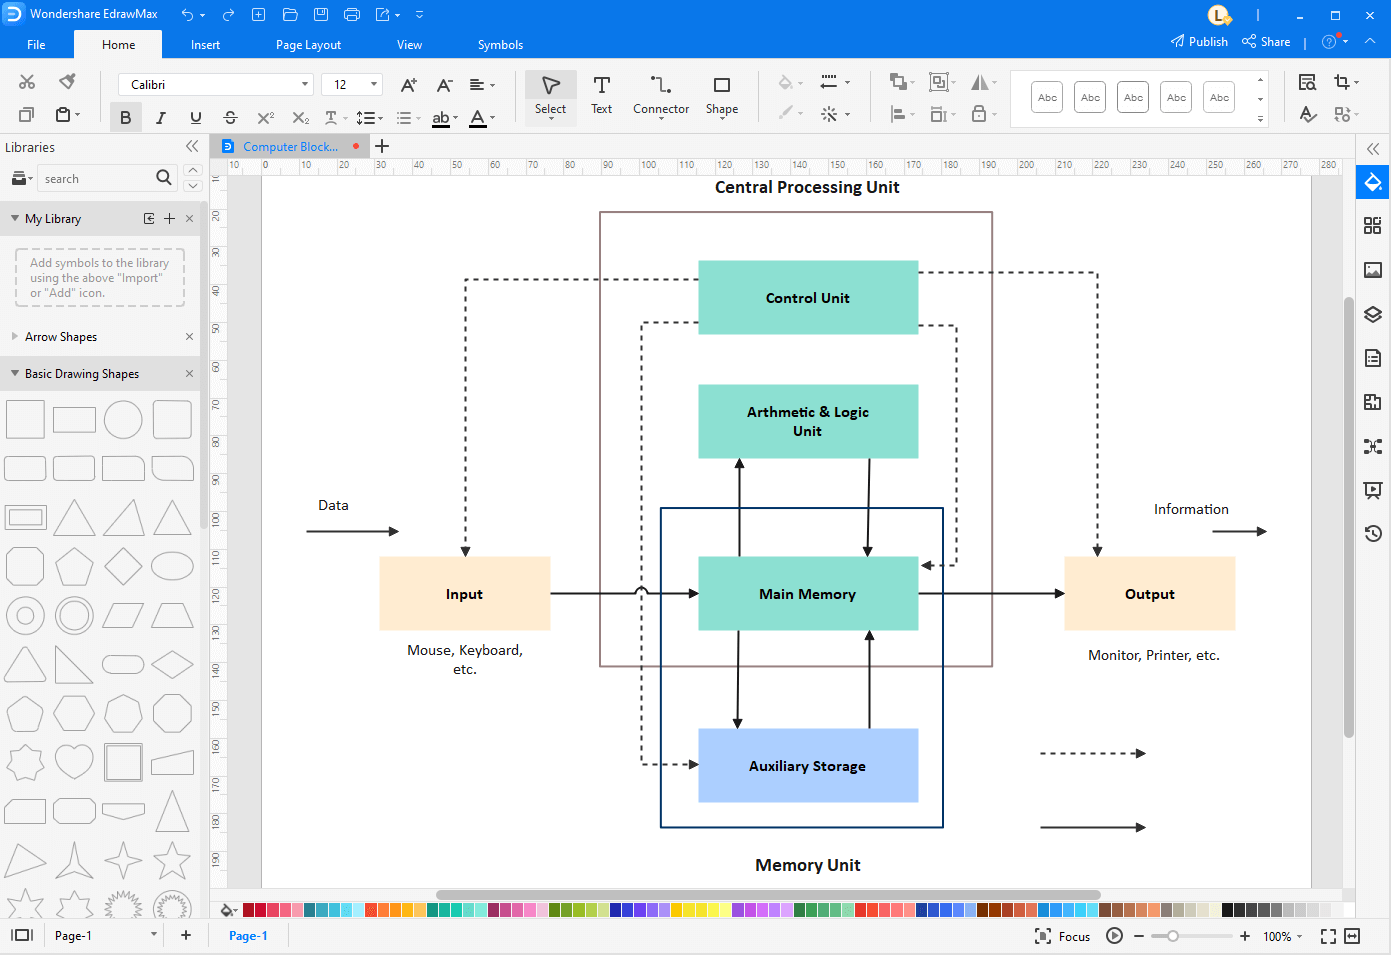
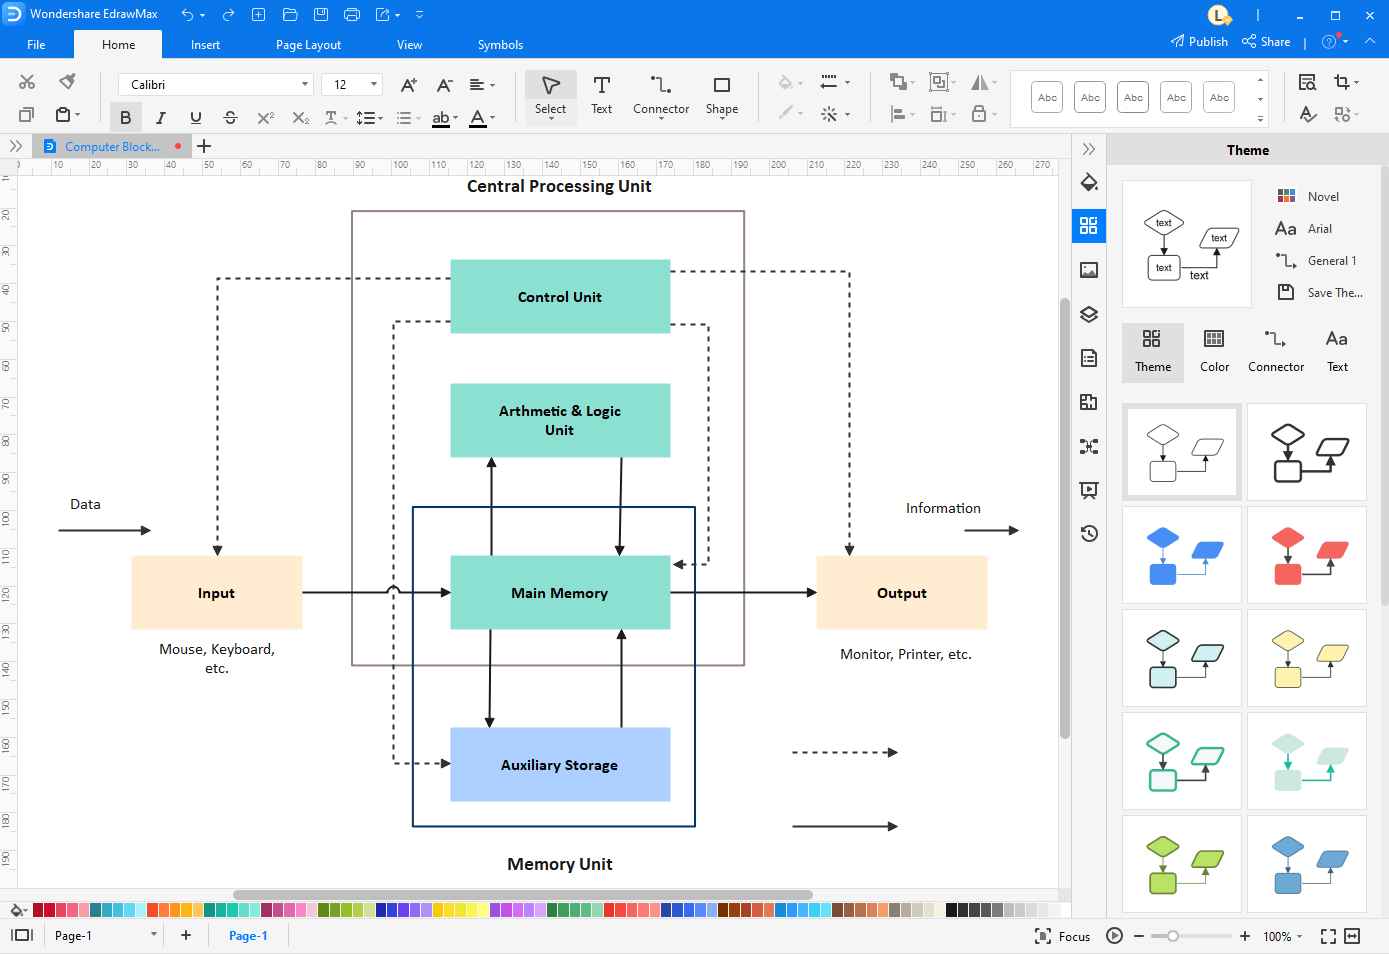
Step 3: Edit the Diagram
To add details to the diagram, you can drag any shape from the library in the left pane to the canvas and label it as needed. It is also important to add a relationship line connecting the existing block with the one you added, so the illustration looks relative and complete. To format an existing shape, you can use the tools present in the right pane of the interface.
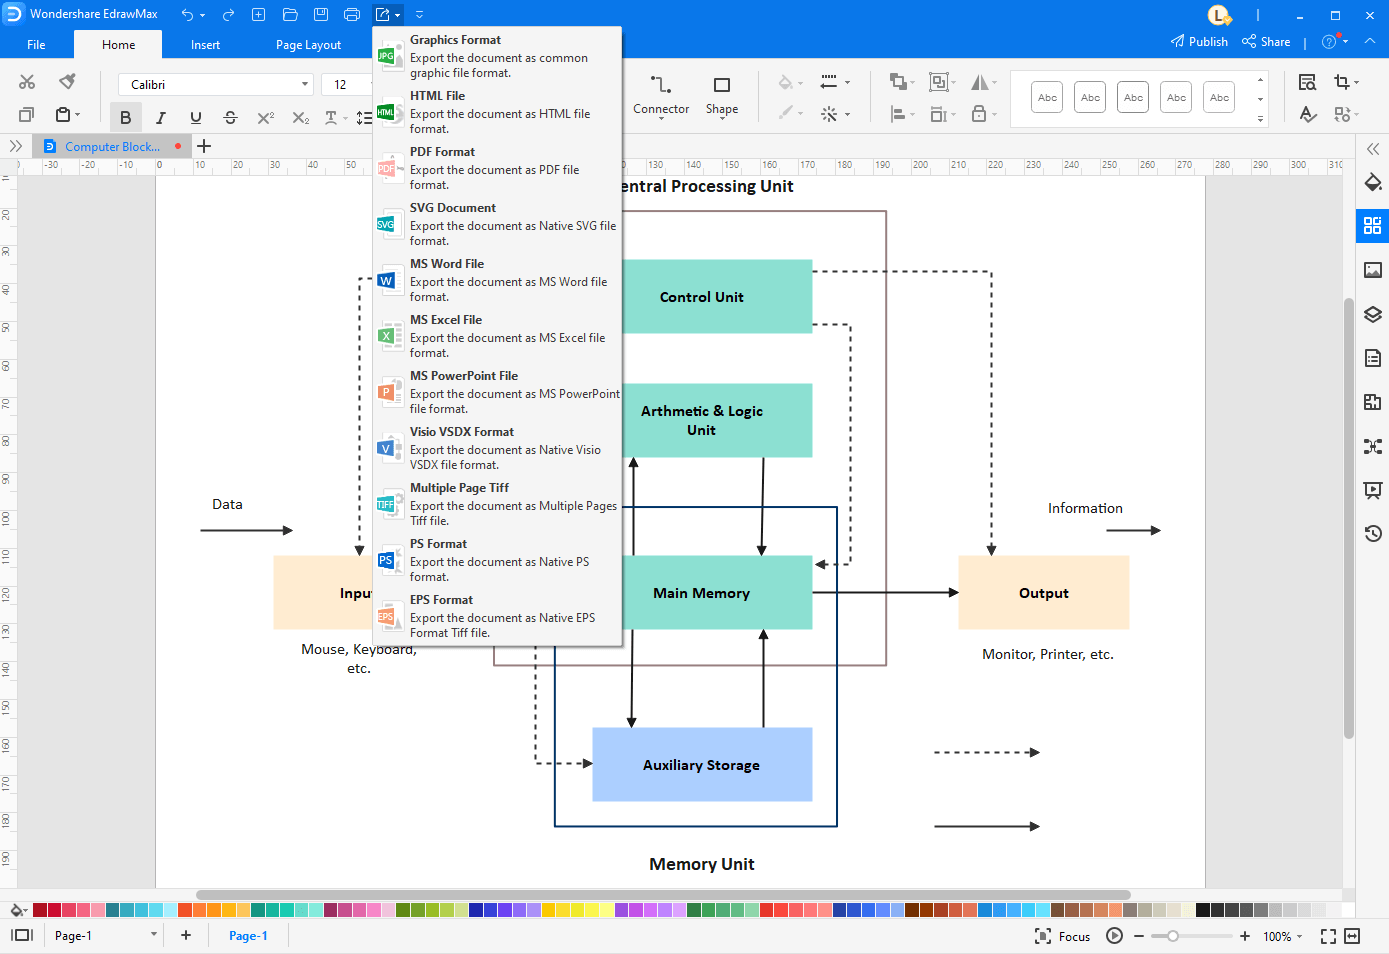
Step 4: Save and Export the Block Diagram
After you have completed drawing a block diagram, click the Save (Floppy) icon from the quick access toolbar present at the top-left corner of the interface. Next, to export the illustration, click the More button next to the Export icon at the top left, and choose your preferred format to export the diagram in.
Tips for Making a Block Diagram
Some best practices that many professionals have always followed and suggest everyone else do the same include:
- Large and Clear Symbols – No matter how small or big the sheet or canvas is, make sure to draw the symbols and icons large enough to be clearly visible and readable
- Correct Labeling – You must pay utmost attention while labeling the blocks. Even a single error while naming might result in producing a completely different output altogether
- Correct Direction of Flow – As with labeling, demonstrating the correct direction of flow in every part of a block diagram is equally important to get the expected outcome
- Several Dry Runs – Make sure to assess the block diagram several times after its creation. This would ensure that you get the product/result as per your expectations
Block Diagram Example
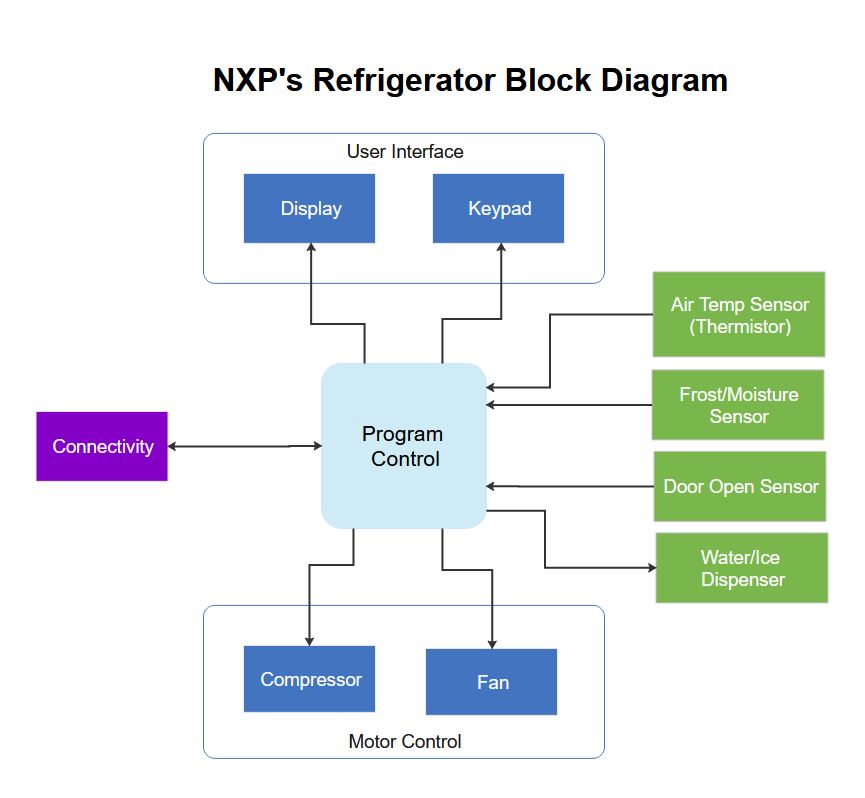
The above block diagram template illustrates the functioning of an NXP’s refrigerator. As you can notice, the first two blocks are packed inside a parent block that represents the user interface. While the first child block is a display unit, the second one allows a person to interact with the equipment with the help of the keypad. Program Control, the round-corner block at the center, works as the brain (processor) of the refrigerator and is responsible for various processes that are again represented by different blocks. The relationship between the functions and Program Control is illustrated with the help of the connecting lines. Another parent block named Motor Control at the bottom also comprises two-child blocks that show the parts the motor of the refrigerator has.
With the help of the above diagram, it would be easy for the engineers and workers to get a clear idea of how a fully functional refrigerator would work.
Conclusion
While a block diagram gives an overview of a system or a process that you are planning to implement, if required, it could be as detailed as possible to make things clearer to the management, administration, and to those who are not directly involved in making the process work. In this context, it would be wise if you use an efficient tool like Wondershare EdrawMax to expedite the entire diagram creation process and prepare an illustration that is easy to understand.
More Related


