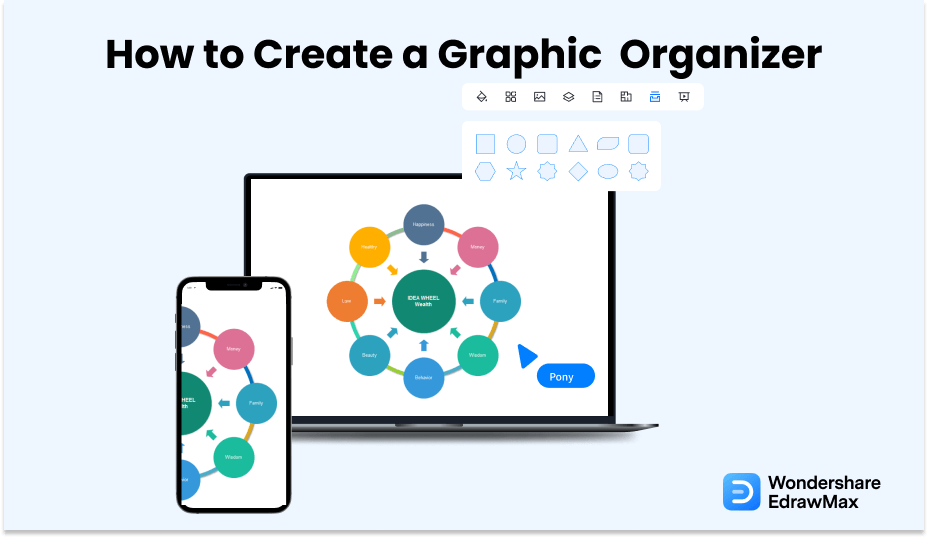
How to Create a Graphic Organizer
Edraw Content Team
Do You Want to Create Your graphic organzier?
EdrawMax specializes in diagramming and visualizing. Learn from this article to know everything about how to create your graphic organizer with ease. Just try it free now!
According to research, visual media provides 65% retention time compared to the 10-20% of information retained from a verbal or text lecture. This means that integrating images, videos, charts, mind maps, and graphs, with text, keeps your audience more alert and able to retain the information. In this light, this article will provide a stepwise guide on how to create a graphic organizer and the best tool you can use to do this.
1. What Is a Graphic Organizer
A graphic organizer is a visual tool that integrates text and visuals to display ideas in a simplified way. This form of visual communication can be employed in official presentations, trade shows, teaching arenas, websites, media posts, and much more.
EdrawMax is an example of a program you can effectively use to create a graphic organizer, offering you a wide variety of drawing tools to better illustrate your ideas. With this software, one can create flowcharts, mind maps, graphic organziers, network diagrams, and just about any visual aid that pops into your mind.
Generally, a graphic organizer is also referred to as a mind map, story map, advanced organizer, concept diagram, or even knowledge map depending on where it is utilized.
A graphic organizer is a visual tool that integrates text and visuals to display ideas in a simplified way. Graphic organizer is also referred to as a mind map, story map, advanced organizer, concept diagram, or even knowledge map depending on where it is utilized.
2. Importance of Graphic Organizer
The main reason behind the use of a graphic organizer is to clarify information as well as help the receiver easily internalize the information fed to them. Besides this, it can also be beneficial in the following ways:
- It's an effective way of teaching. It breaks down more complex concepts into simpler parts that students can quickly grasp and remember. This way, they can easily engage and contribute in the classroom.
- It helps your audience brainstorm, reflect on your content and categorize the information they receive.
- A graphic organizer provides a ground basis to quickly connect to similar information in the future.
- They can also be used as note-taking perks, hence promoting self-learning and easy comprehension among students. PS: it's never boring to learn with images.
- Last, but not least, graphic organizers benefit every kind of student, regardless of their learning abilities or disabilities. It is a hands-on technique that teachers are encouraged to use, especially with ELLs and students with learning disabilities.
Now that we are in the know-how, let's proceed to how to make a graphic organizer.
- To clarify information as well as help the receiver easily internalize the information fed to them;
- easily engage and contribute in the classroom;
- Provides a ground basis to quickly connect to similar information;
- Promoting self-learning and easy comprehension among students.
3. How to Make a Graphic Organizer in General
Whether you are using Google Classroom, Kapwing Studio, or Canva, the following steps will help you produce your desired story map.
- Step 1: Launch a free organizer template:
- Step 2: Customize the free template:
- Step 3: Add text:
- Step 4: Polish your design:
- Step 5: Download and share:
A free template is usually equipped with all the drawing tools you may need to create an epic mind map. With a free version, you can customize your design. Immediately you open a free template, click on the 'Make it' or 'Create' bar and a default template will appear on your screen.
Once you have the default arrangement, you can use it as is or rearrange it to your liking by adding shapes to match your content description.
When all is up to scratch, fill out each shape with text. You can do this either by double clicking inside the shape where a text box will appear or clicking on the 'Text' tab. Format the text to your desired font size and color at the 'Edit' tab.
Do the final touches to your design to make it satisfactory and attractive to the eye. At this point, you can play around with background colors, color fills, line colors, animations, and so on.
Save changes and download your template at the 'Export Image' button. Choose a suitable format for your design and afterward share it with your target audience.
- Launch a free organizer template;
- Customize the free template;
- Add text;
- Polish your design;
- Download and share.
4. How to Make a Graphic Organizer in EdrawMax
Navigating the EdrawMax software to create a graphic organizer is just as easy as the aforementioned steps.
4.1 Make graphic organizer from a sketch
Step1 Login to EdrawMax
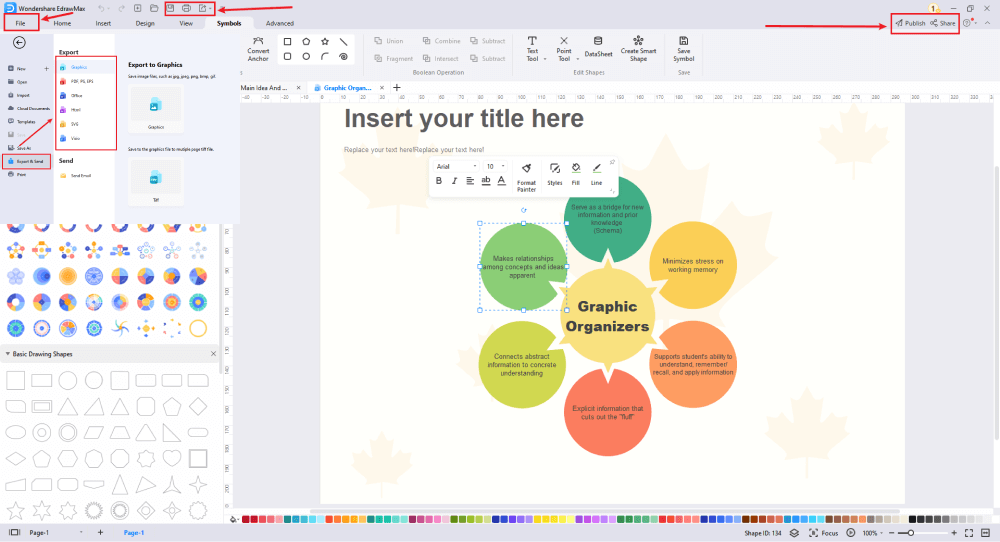
If you are using the offline version of EdrawMax, then open the tool in your system. If you wish to have remote collaboration, head to EdrawMax Download and log in using your registered email address. If this is your first time using the tool, you can register yourself using your personal or professional email address. Login to EdrawMax, find the category in EdrawMax, and the 'Graphic Organizer' section.
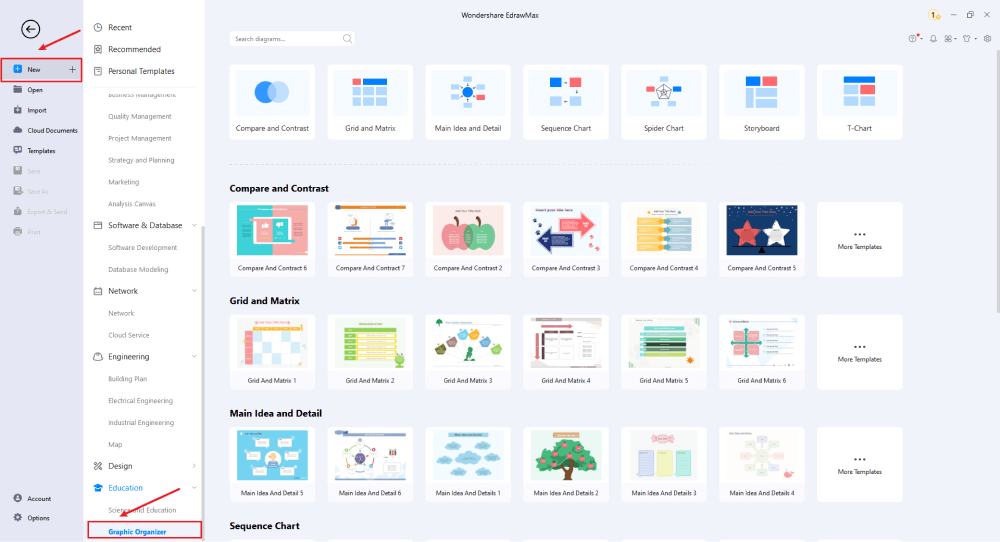
Step2 Open a New Canvas
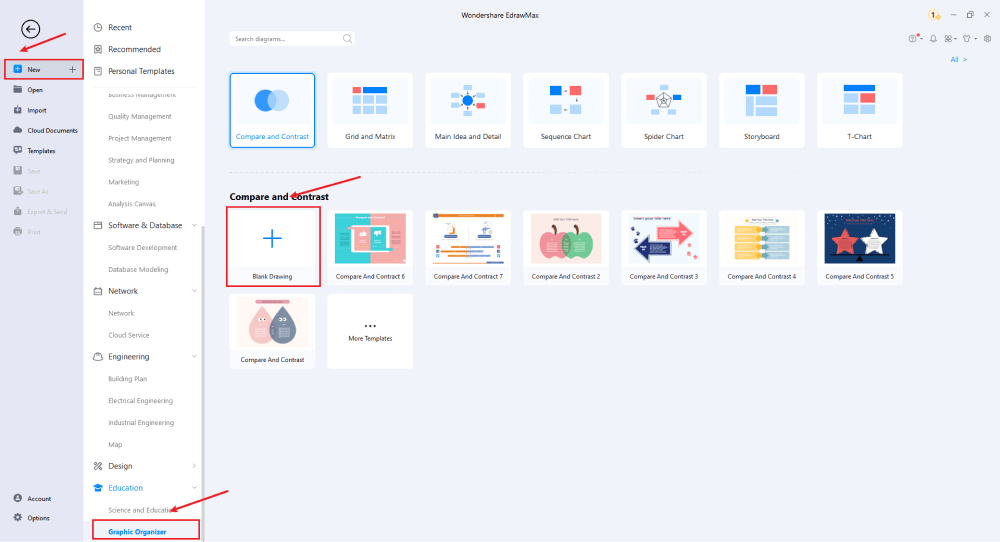
Since you are creating the graphic organizer diagram from scratch, you can click '+.' Simultaneously, click on 'Graphic Organizer' to access free templates or sketches provided by EdrawMax. After clicking on '+,' It will open up the user-friendly EdrawMax canvas.
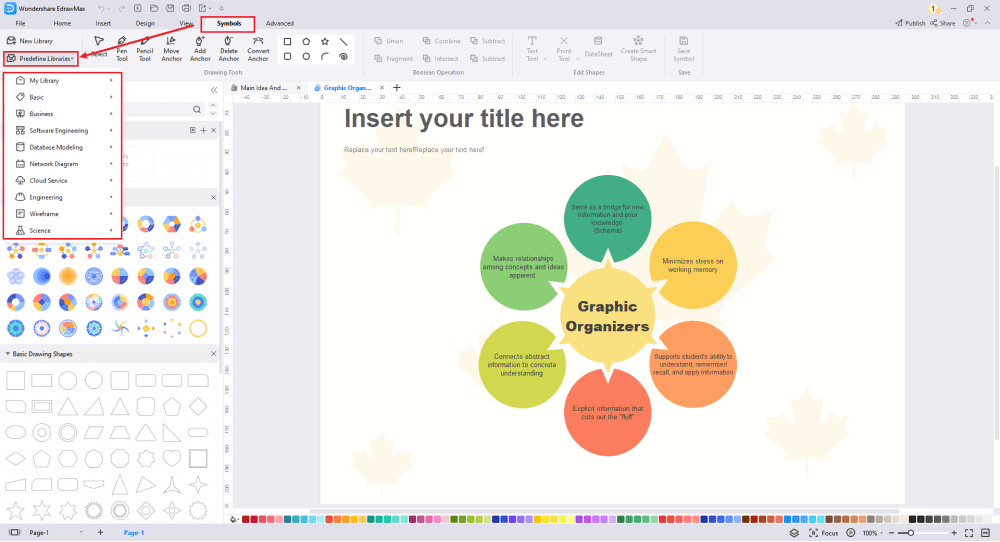
Step3 Find Graphic Organzier Symbols
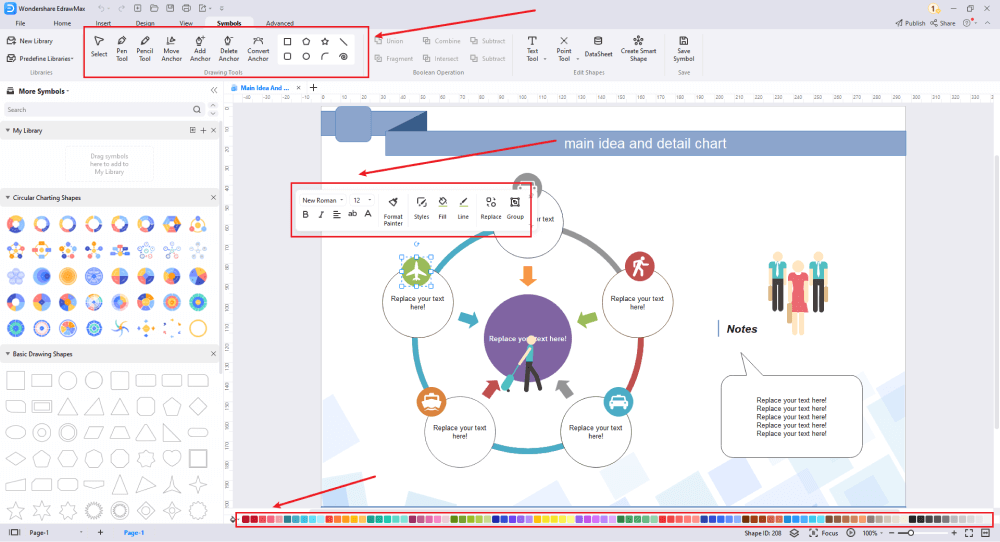
Consider the elements and layout, find proper symbols from the symbol library, or create your symbols and save them for future use. From the symbol library on the left side of your screen, you can simply add shapes, charts, graphs, icons, etc. Drag and drop your object on the drawing page and connect the shapes with lines to give a flow of content.

Step4 Add More Elements
Once you have imported all the symbols, you can start placing them in the graphic organizer that you have created in Step #2. Your design can add multiple elements. These symbols are vector-based, so you can recolor, reshape, and resize them without losing their formatting. Then, add text to your drawing by double clicking on the text boxes and toolbar. Customize your design to your liking by adding the necessary features.
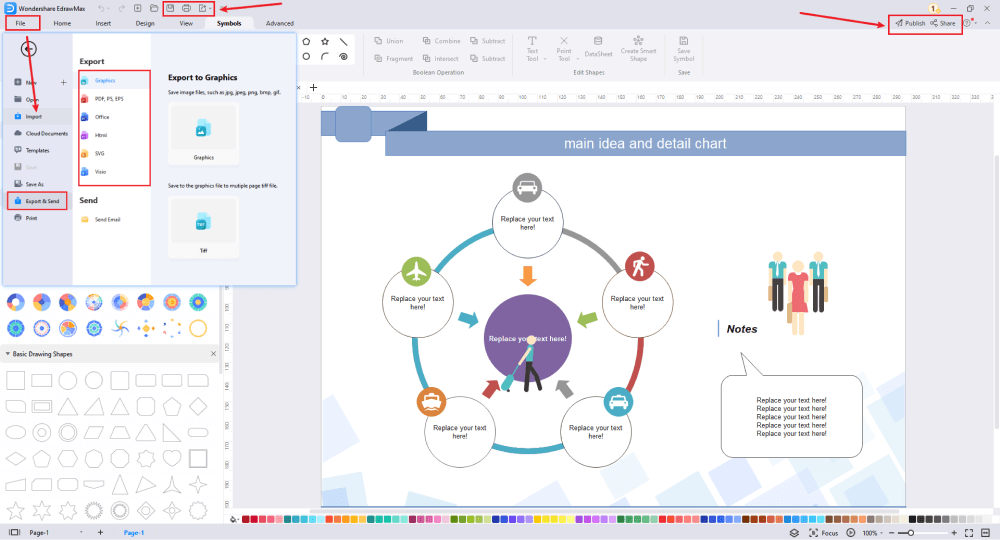
Step5 Save & Export
After drawing your design, you can export it into multiple formats, like JPEG, JPG, PNG, PDF, and other Microsoft formats, like MS Word, MS Excel, PPTX, etc. You can also share the graphic organizer on different social media platforms, like Facebook, Twitter, LinkedIn, etc. Moreover, you can print your plumbing plan drawing for showing with others.
4.2 Make a graphic organizer by a built-in template
Step1 Login to EdrawMax
If you are using the offline version of EdrawMax, then open the tool in your system. If you wish to have remote collaboration, head to EdrawMax Download and log in using your registered email address. If this is your first time using the tool, you can login to EdrawMax and find the templates from Template Community.
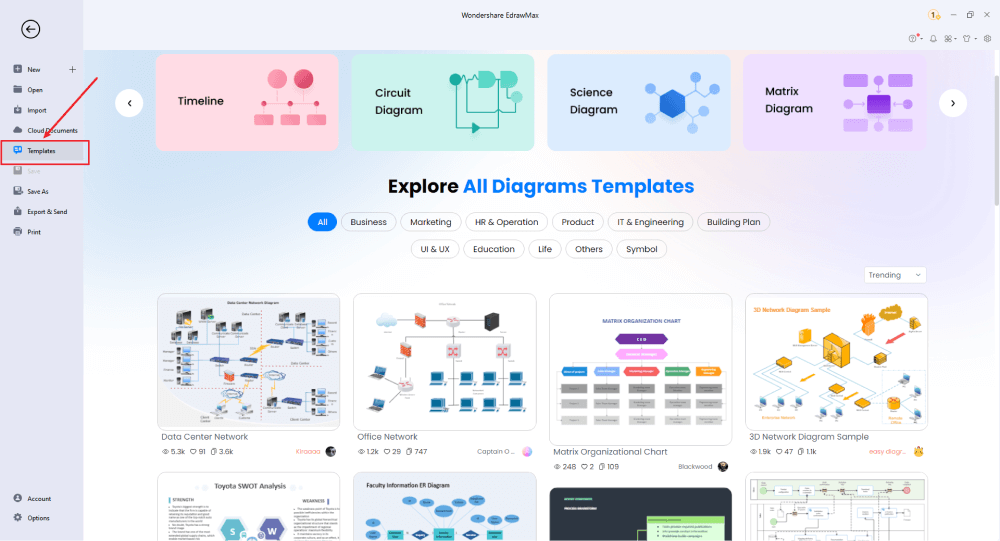
Step2 Choose a Template
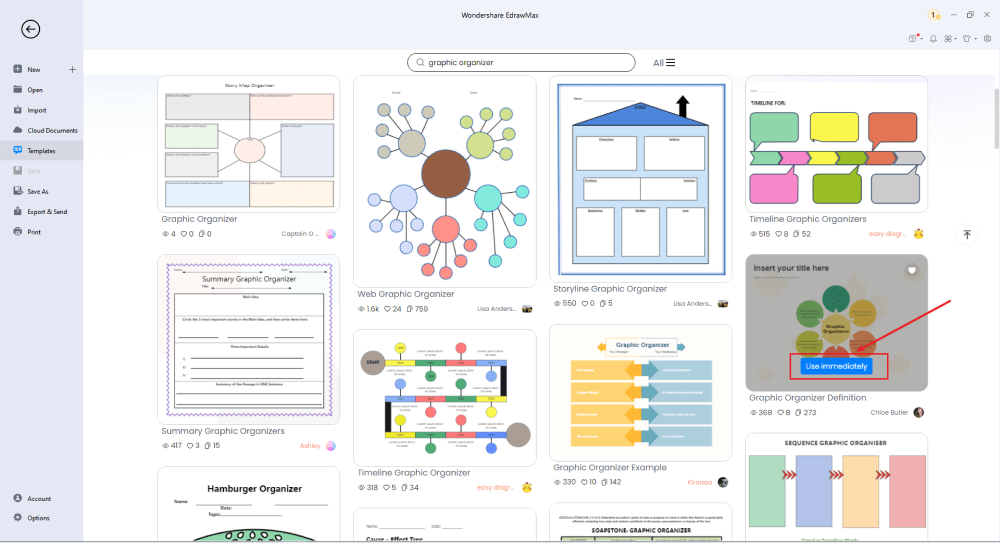
In the template community, you will find hundreds of built-in free graphic organizer templates readily available to use. Choose your desired template and click 'Duplicate'.
Step3 Add Symbols
Modify the details to your liking by changing the font, color, size, etc. Use the following commands to your advantage:
- Delete shapes by selecting them and clicking the delete button.
- Duplicate shapes by selecting the specific shape to duplicate and click 'CTRL' + 'C' and 'CTRL' + 'V' on your keyboard.
- To add a shape to the next level, click on the '+' button at the corner of the preceding shape.
- Use the 'Edit' tab to make changes in fill color, outline color, line color, background color, opacity, and an outline width, among other functions.
- Explore the 'Style' tab to make significant changes to the outline of your story map.
Step4 Export or Publish
Once your creation is finished, export the image to download and publish your design in the Template Community by clicking 'Publish' in the upper right corner.
Basically, it is simple to make a graphic organizer in EdrawMax, just grab a template and keep customizing, drag and drop professinal graphic organizer symbols to make your design better. If you are still confusing about how to create a graphic organizer in EdrawMax, just check the video below, or learn more from our Youtube channel.
6. Tips & Consideration
When making a graphic organizer for the first time, it is highly recommended to use one of the free graphic organizer templates provided by EdrawMax. When using the templates, some important tips to get you rolling include:
- Before you start drawing, list all the important aspects of your description to avoid mistakes while modeling your design. This will also give you a flow once you start drawing.
- You can insert pictures or tables on your drawing page by clicking on the 'Insert' tab and selecting a table or image. Alternatively, you can press 'CTRL + ALT + I' or 'CTRL + ALT + T' on your keyboard, to insert images or tables, respectively.
- You can utilize different templates to suit your needs. For instance, you can highlight your pros and cons information on a pros and cons T chart template. A fraction chart template can be used to illustrate parts of a whole in a mathematical context and so on.
7. Comparison between General and EdrawMax Methods
- Creating a graphic organizer on paper might get clumsy and look unprofessional. EdrawMax, however, gives your work a professional look allowing you to juggle a variety of drawing elements.
- Drawing graphic organziers manually makes it difficult to share your work with fellow architects who are not in your vicinity. EdrawMax software allows you to share your blueprints via social media platforms and also in various formats, including MS Visio, PDF, JPG, SVG, and MS PowerPoint.
- Making edits on paper is cumbersome and mostly involves erasing everything. With EdrawMax, you can perform unlimited revisions and customize your design as much as you need to.
8. Free Graphic Organzier Software
EdrawMax graphic organizer maker has numerous built-in symbols and templates to assist you in effortlessly creating a graphic organizer without any prior skills. The software allows you to enjoy the following features:
- Team collaboration through a free cloud storage system.
- A drag-and-drop functionality of symbols from the symbol libraries.
- A variety of customizable templates from Template Community to suit your content.
- You can export image, print, and share your work with ease.
8. Final Thoughts
With our step-wise guide on how to make a graphic organizer, you can now launch the program and enjoy a lifetime service exploring various user-friendly features and creating mind-blowing story maps. What are you waiting for?
If you have ever wondered how to make a graphic organzier, then the answer is -- use EdrawMax and avail the free templates that this free graphic organzier software offers. With these graphic organzier designs, you can not only impress your architect or client but can start your journey in constructing your dream project.
Graphic Organzier Complete Guide
Check this complete guide to know everything about graphic organzier, like graphic organzier types, graphic organzier symbols, and how to make a graphic organzier.
You May Also Like
Creating Gantt Chart From Data
How-Tos
How to Open Visio on Mac
How-Tos
How to Convert Visio to Word
How-Tos


