How to Create Information-rich and Persuasive Infographics
Part One: dos and don'ts for creating information-rich and persuasive infographics
1) DO: keep it simple and to the point.
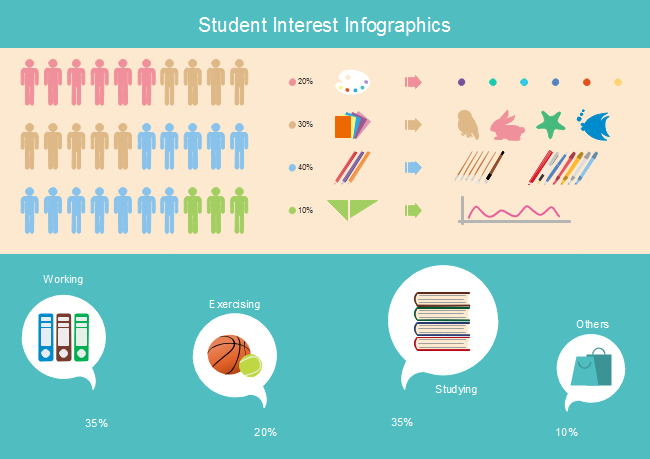
Have one strong point and build your infographics around it thus readers understand what message to send with their infographics immediately and easily. Your infographic topic should be clear enough to be communicated in a short sentence. In below infographic, it is not hard to understand which object the students are interested in.
2) DON'T: try to say too much with one chart.
Poorly organised data won't get you very far. To create more persuasive charts, stay focused on categories that help you make your point.
3) DO: make your message believable.
Accurate date, customer quotes, testimonials, expert support, appropriate images can make your messages persuasive.
4) DON'T: show dry numbers without context.
Using data correctly can start conversations and incite curiosity.
Part Two: how to create information-rich and persuasive infographics
Edraw Infographics Maker, a simple and powerful Infographics Software, should be what you need to draw infographics for information-rich and persuasive infographics.
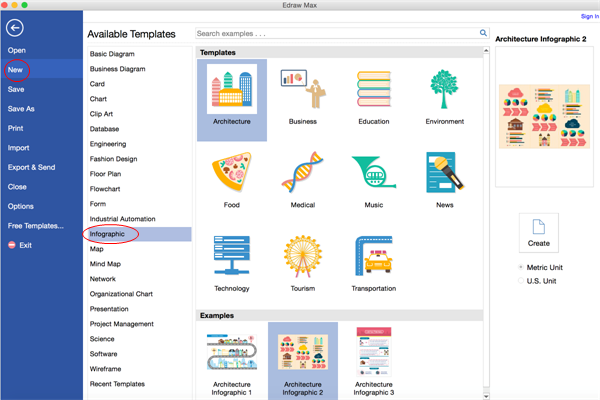
1. Open a blank infographics drawing page
Go to File menu>New>Infographic, and then double click its icon to open a blank drawing page
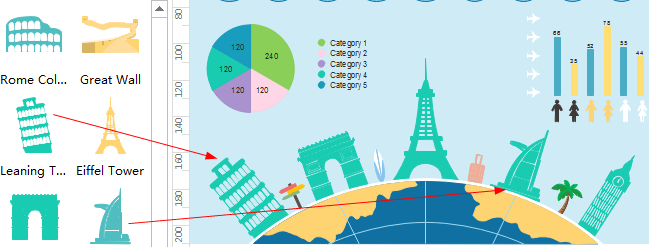
2. Add infographic shapes
Simply drag and drop related shapes to the drawing page from left library.
3. Add contents to infographics
Double click the shape, a red box shows, you can type contents in the text box now.
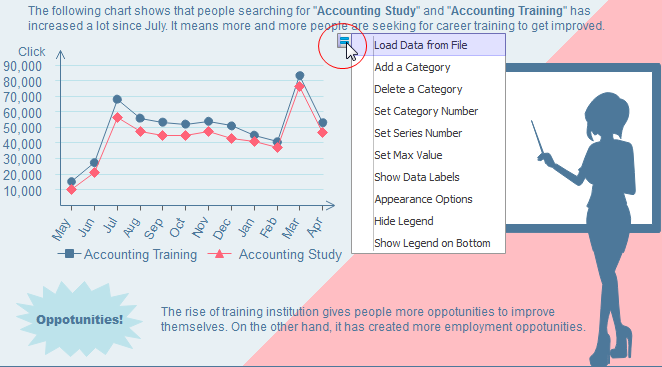
4. Edit infographic charts
Rest your cursor over the smart chart to show the floating action button. Add or delete a category by clicking relevant menus. Double click the data label to enter your own data.
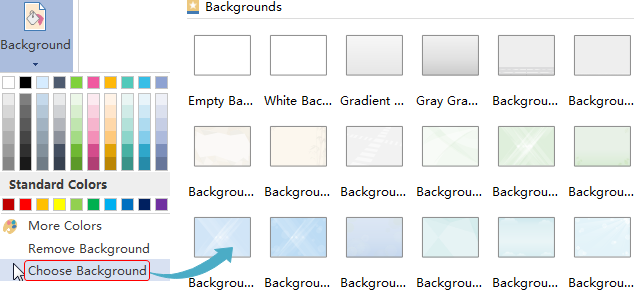
5. Add background to infographics
Go to Page Layout tab>Background, select a color for infographics background.
6. Save or Export Infographics
Click Save on File tab to save as the default format .eddx or you can also choose Save As on File tab to save as other formats.
More Articles to Read about Infographic Design:
Six Top Benefits of Using Infographics
How to Design Infographic Header
How to Lay Out an Infographic in 10 Minutes

